Managing storage in virtualized environments isn’t just about adding disks; it’s about ensuring performance, scalability, and **resilience **while controlling costs and downtime.
Whether dealing with aging on-prem hardware, hybrid workloads, or budget-sensitive cloud extensions, storage design directly impacts stability and growth.
In this hands-on lab, I walk through how I approached Hyper-V storage design while consolidating multiple workloads, focusing on practical, repeatable steps that scale from lab environments to production.
What This Lab Covers
In this tutorial, you’ll learn how to:
- Add Virtual Hard Disks (VHD/VHDX) to Hyper-V virtual machines
- Build Storage Pools for elastic capacity and simplified management
- Create Virtual Disks with appropriate resiliency settings
- Configure iSCSI Targets and Initiators for remote, shared storage access
- Extend Hyper-V storage over Ethernet in a cost-effective and scalable way
Why iSCSI for Hyper-V Storage?
iSCSI (Internet Small Computer Systems Interface) allows servers to access block-level storage over standard TCP/IP networks.
Why it works well with Hyper-V:
- Reliable over Ethernet
- Budget-friendly compared to Fibre Channel
- Scales from homelabs to production
- Suitable for hybrid designs extending to cloud platforms
Lab Environment Overview
- Hyper-V Hosts
- Windows Server (File & Storage Services enabled)
- iSC
- iSCSI Initiator (Hyper-V host or access server)
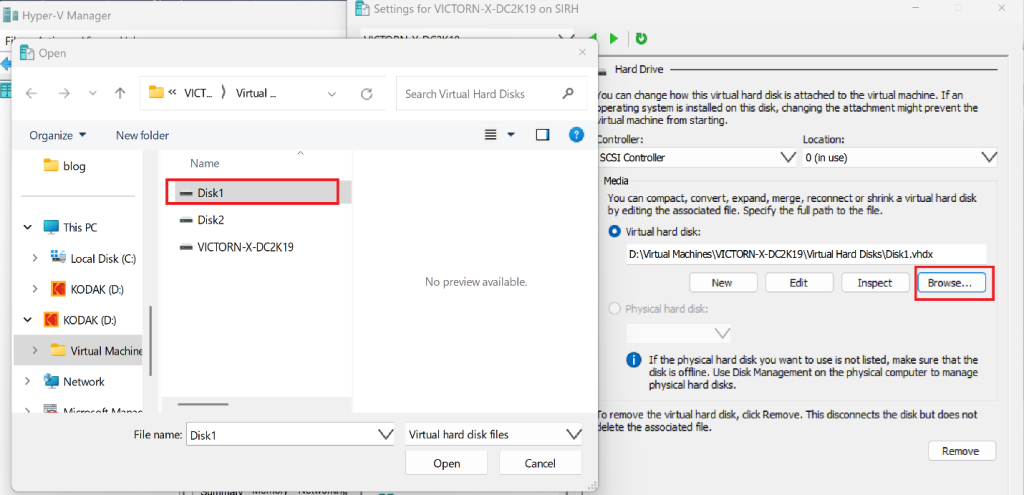
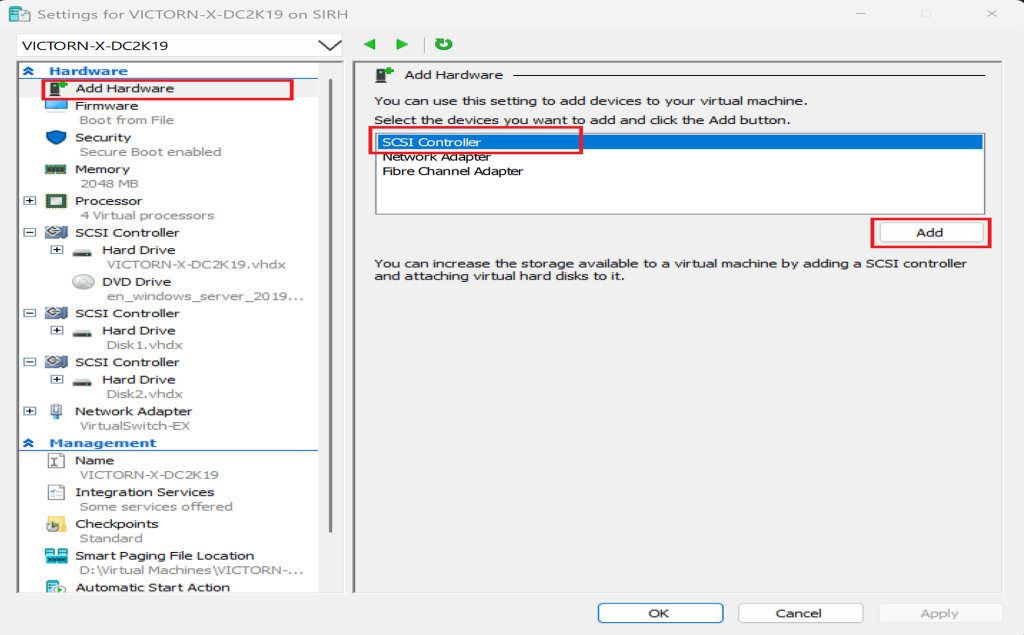
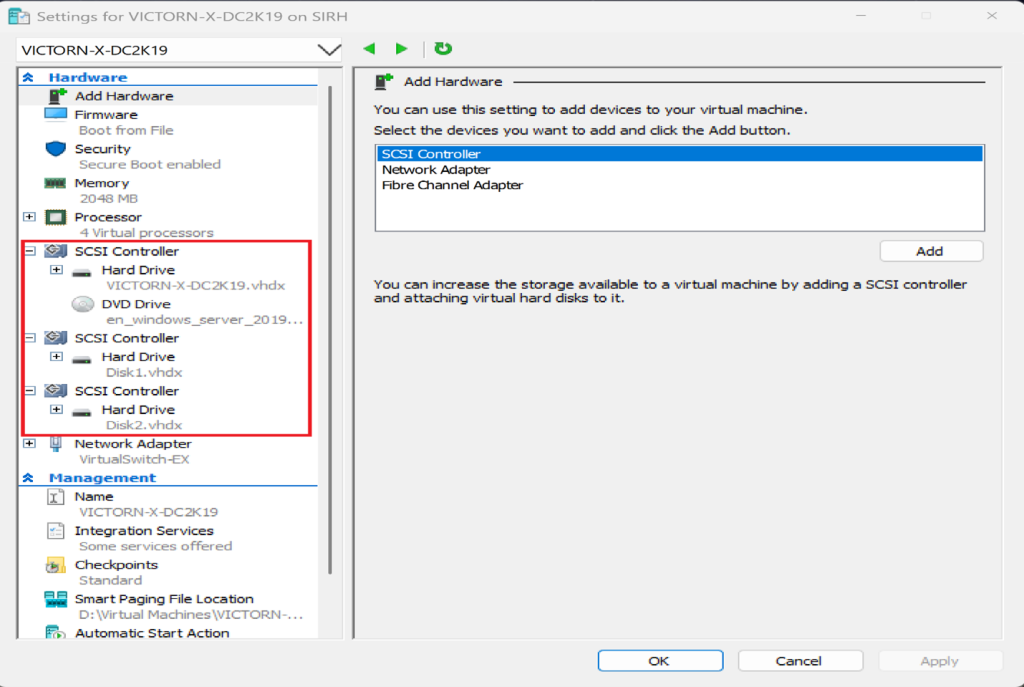
Step 1: Add Virtual Hard Disks to Hyper-V VMs
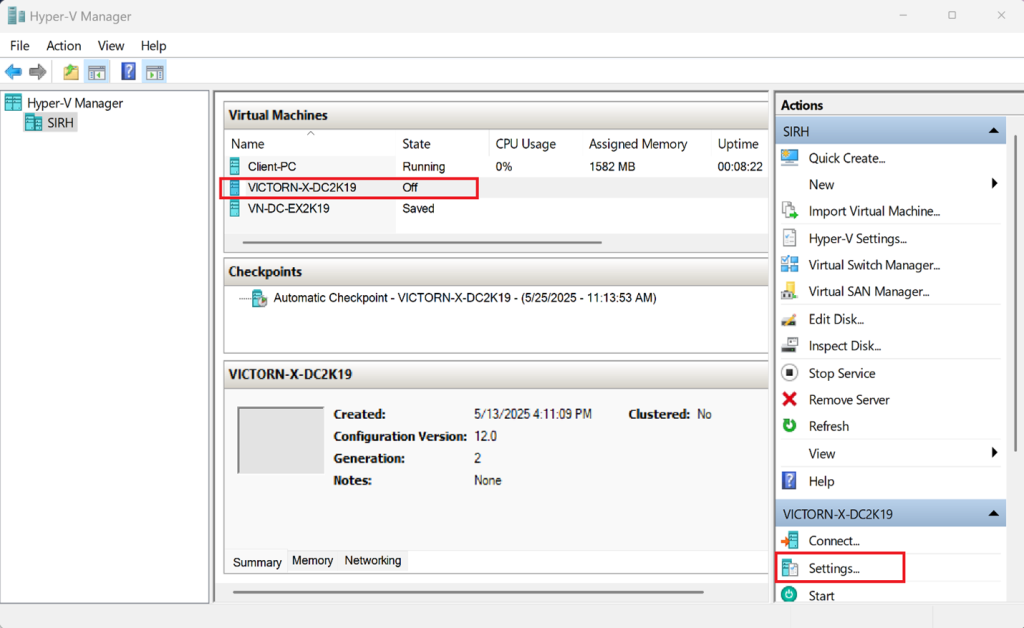
Open Hyper-V Manager
Select the VM → Settings
Under Hard Drive, click Add
Choose New Virtual Hard Disk
Select the Dynamic disk type
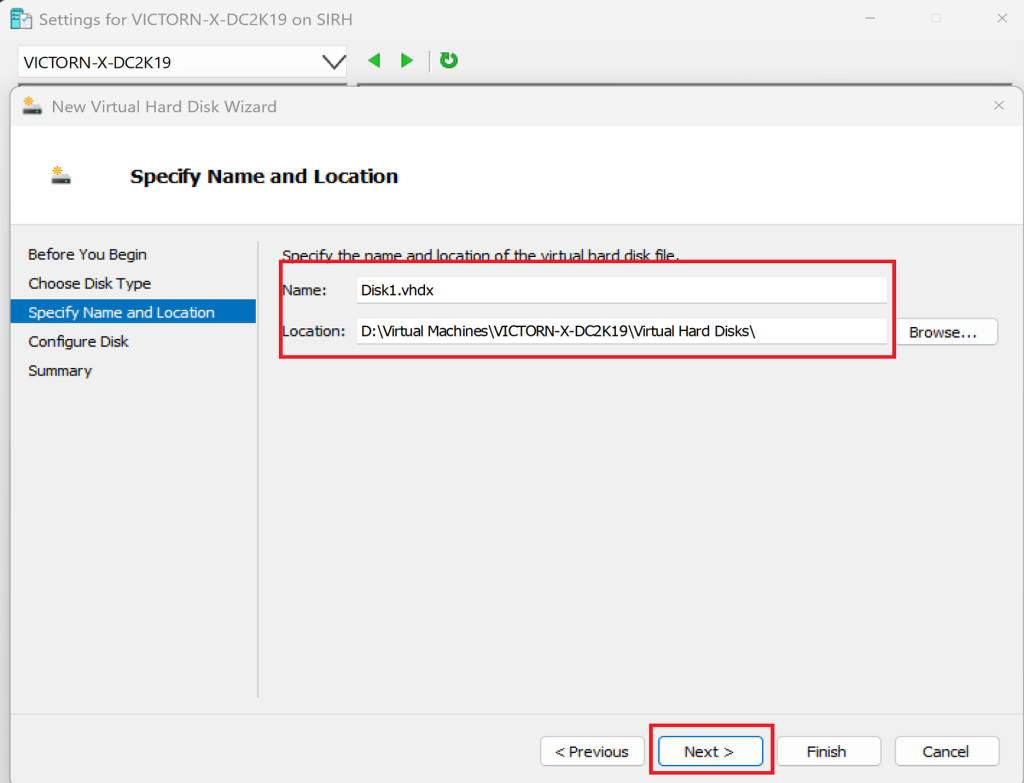
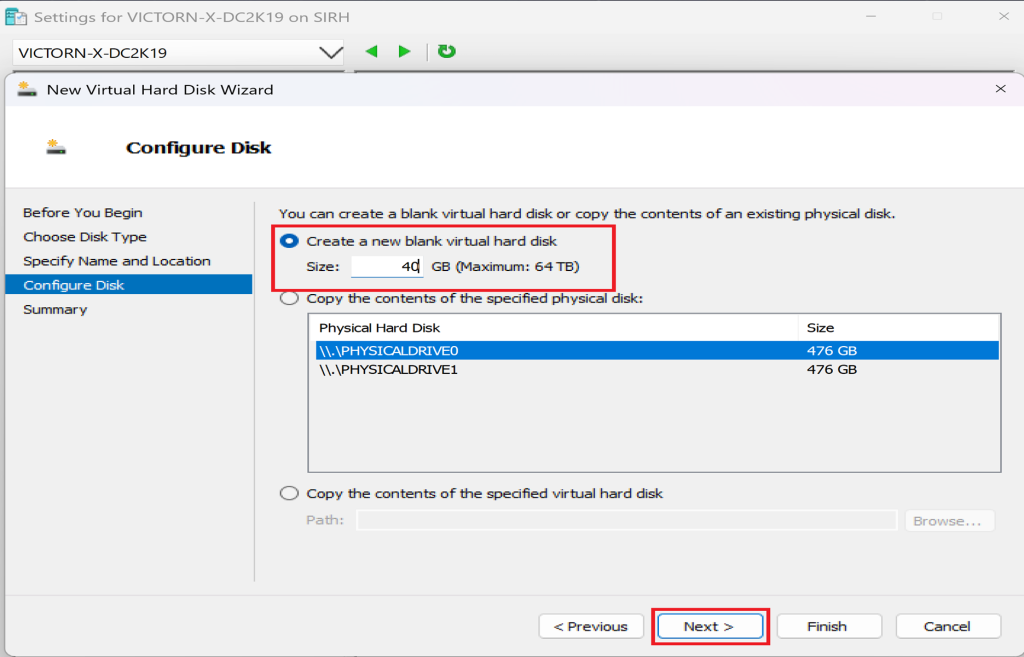
Set disk size and location → Apply
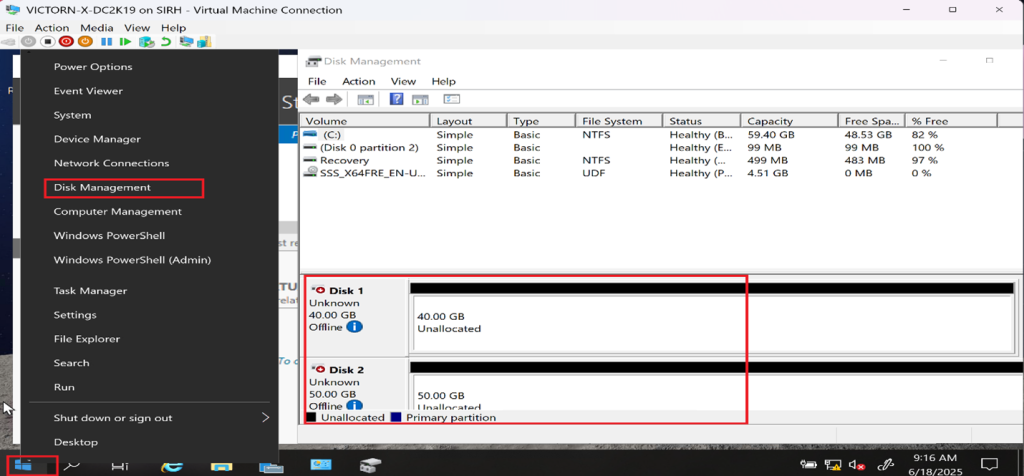
Inside the VM:
- Open Disk Management
- Initialize, partition, and format the disk (no reboot required)
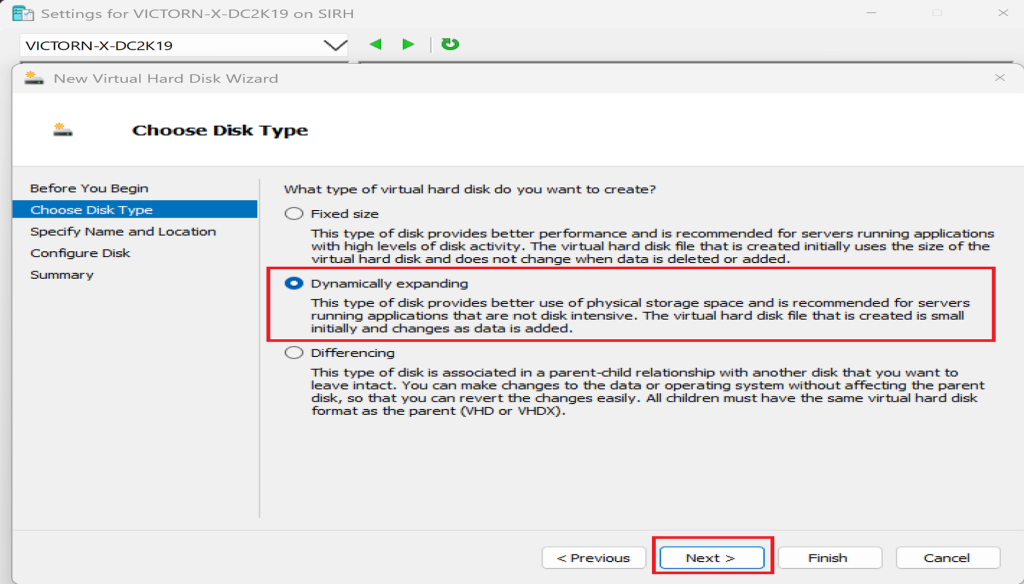
🔸 Pro Tip: Use Dynamic disks unless strict performance baselines require fixed provisioning. Dynamic disks conserve storage and scale efficiently.
Step 2: Create a Storage Pool on the Target Server
Create the Storage Pool
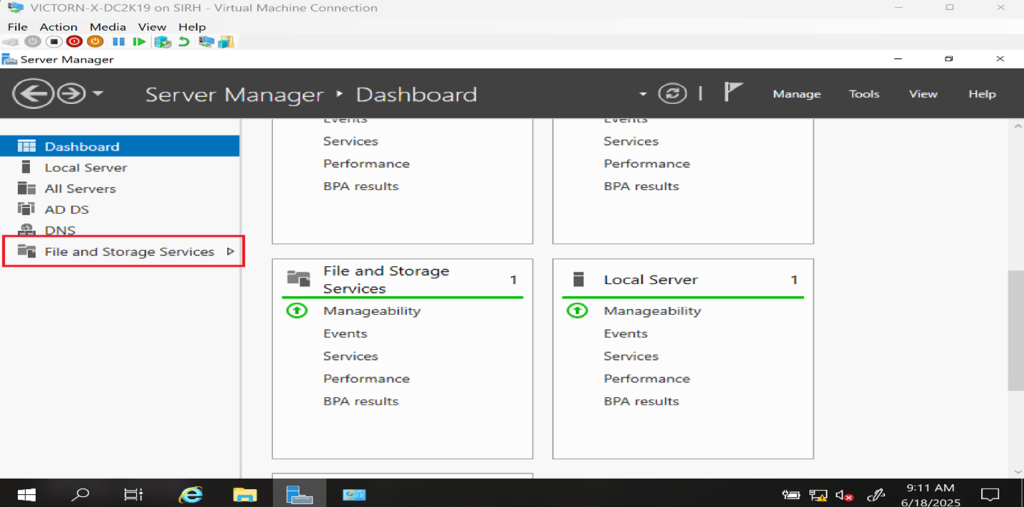
Open Server Manager
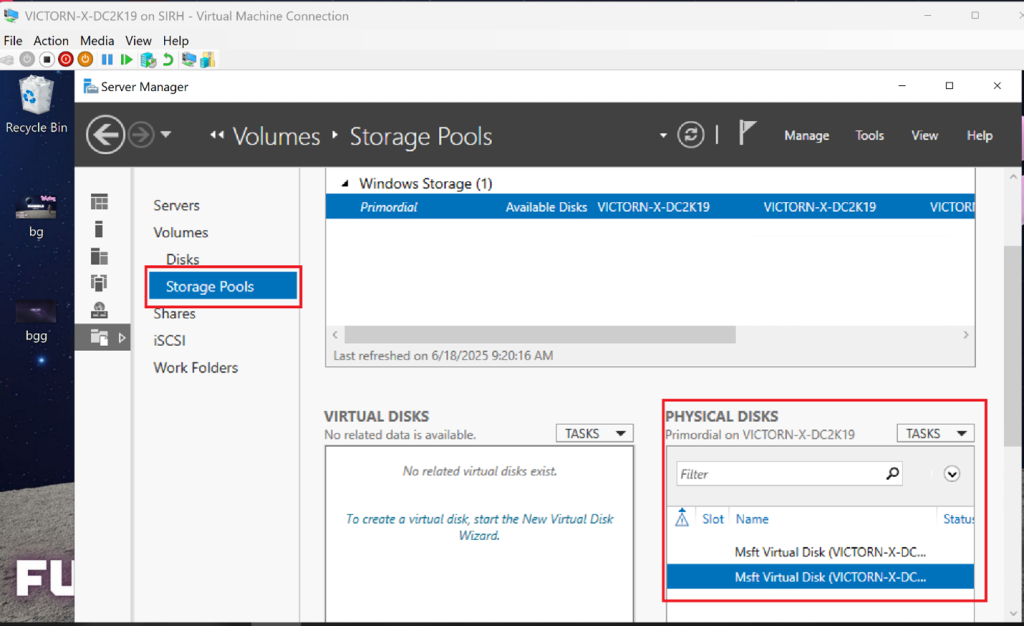
Navigate to File and Storage Services → Storage Pools
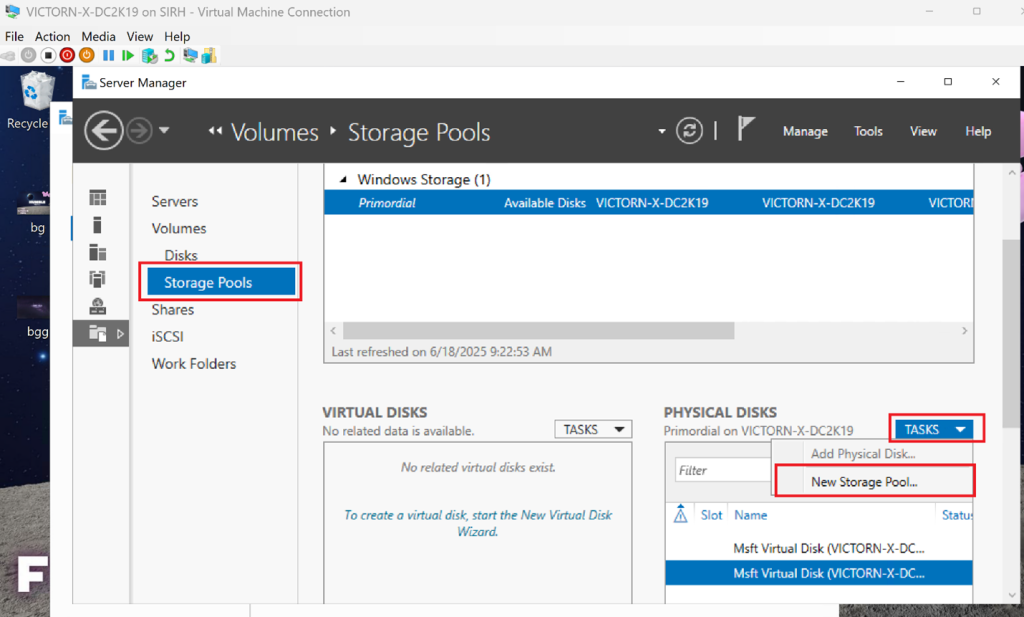
Click Tasks → New Storage Pool
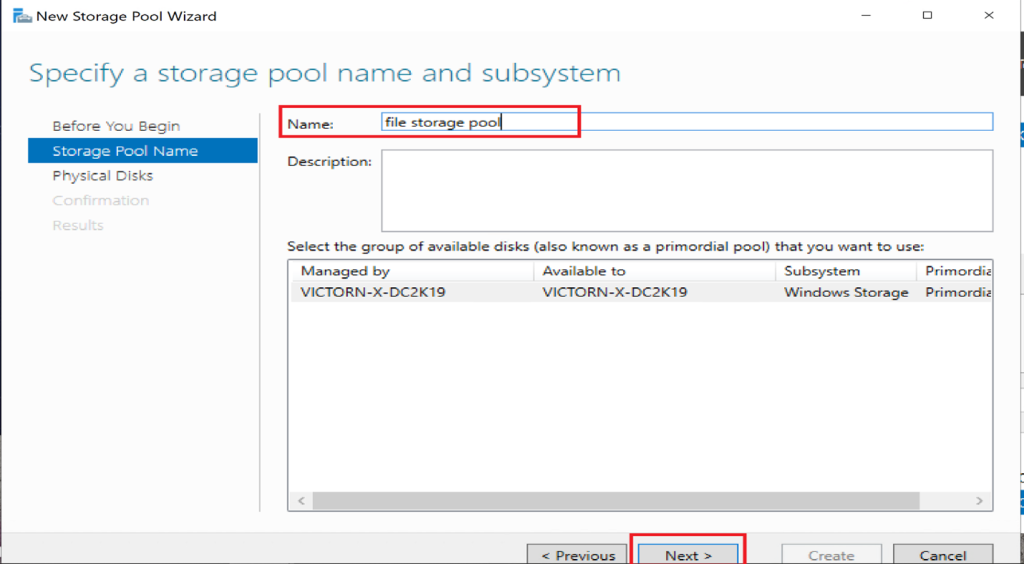
Name the pool
Select available physical disks
Click **Create **to finalize the storage pool.
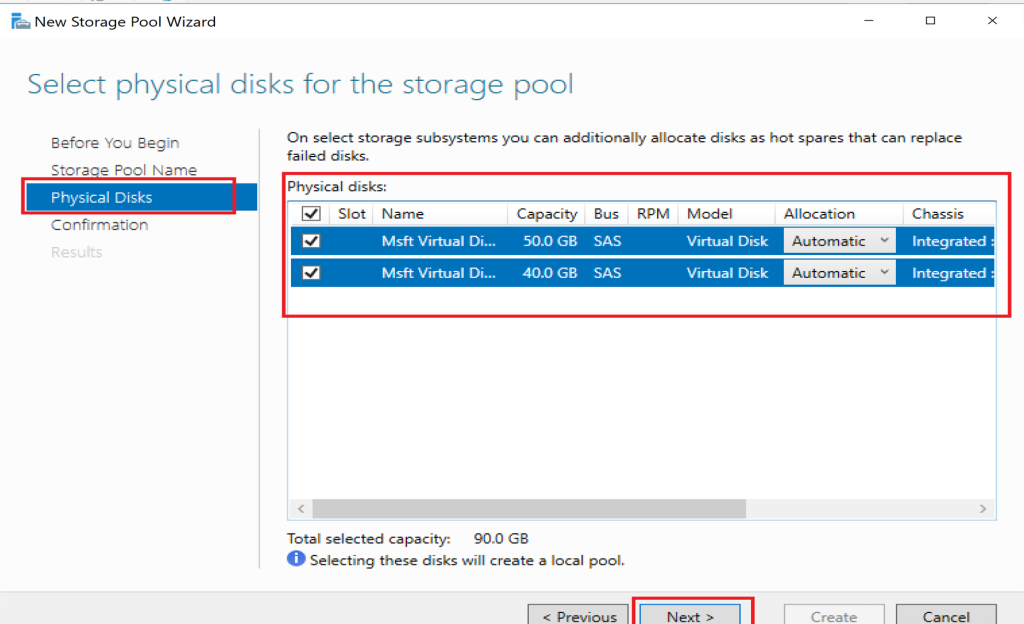
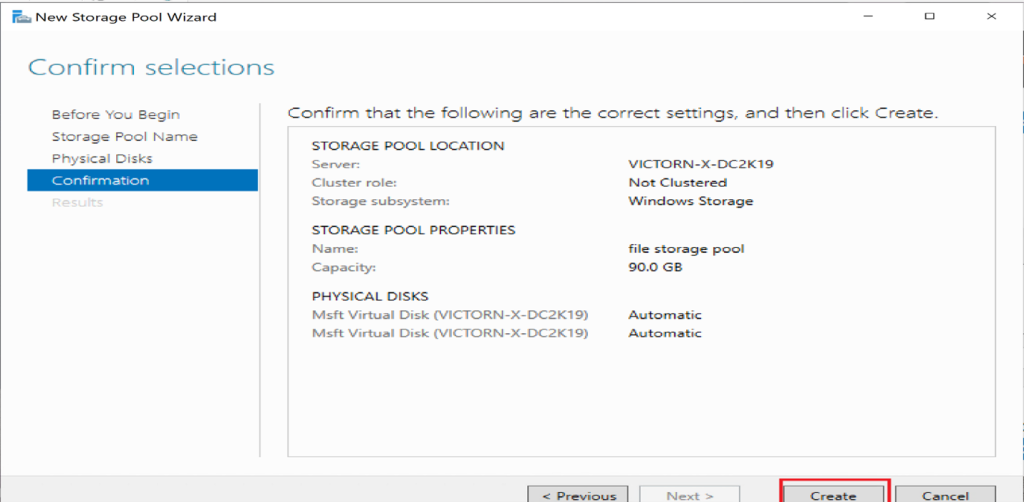
Step 3: Create a Virtual Disk from the Storage Pool
In Server Manager, go to File and Storage Services → Storage Pools
Select your storage pool
Under Virtual Disks, click Tasks → New Virtual Disk
Follow the wizard prompts:
- Choose the storage pool
- Name the virtual disk
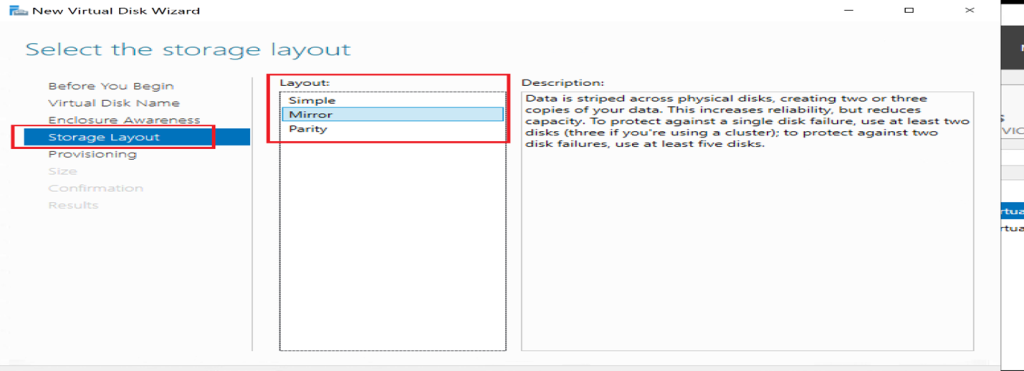
- Proceed with storage layout selection.
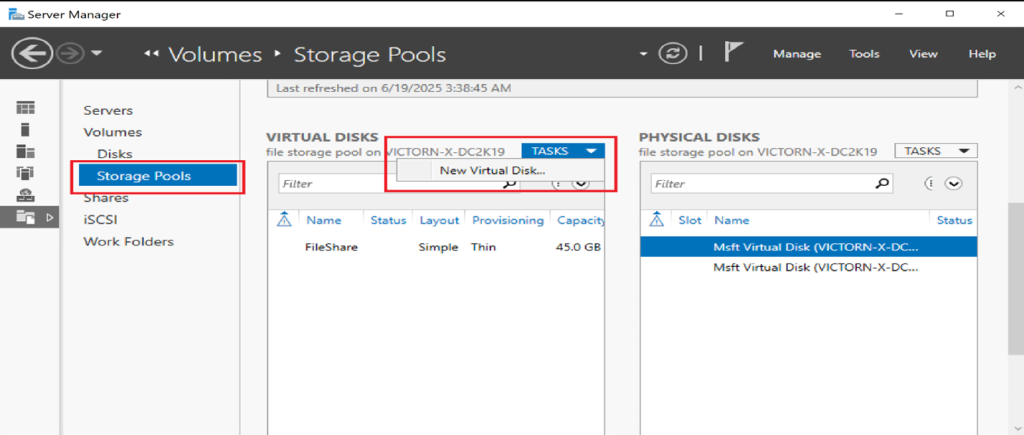
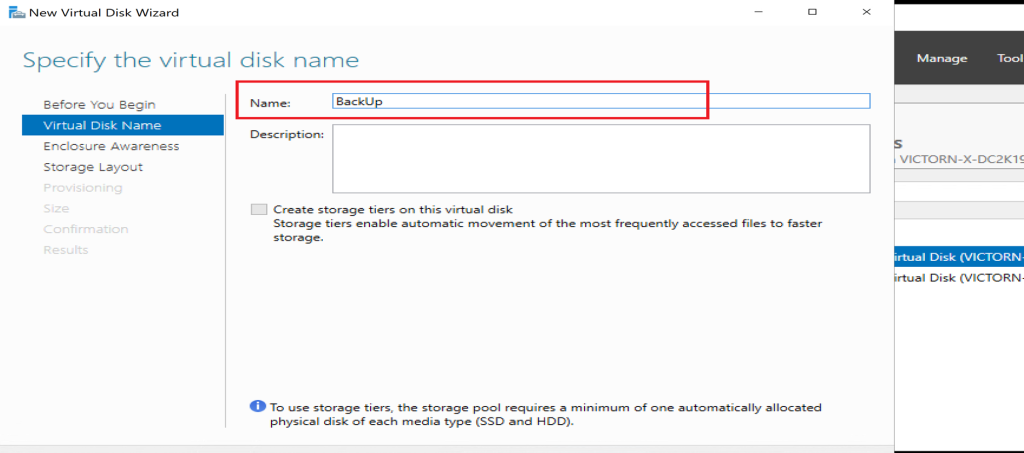
Assign a Resiliency Type
Within the wizard:
Choose the desired Resiliency Layout:
- Simple - Stripes data for performance (no redundancy)
- Mirror - Two-way or three-way replication for Fault tolerance
- Parity - Balanced performance and redundancy using striping with parity.
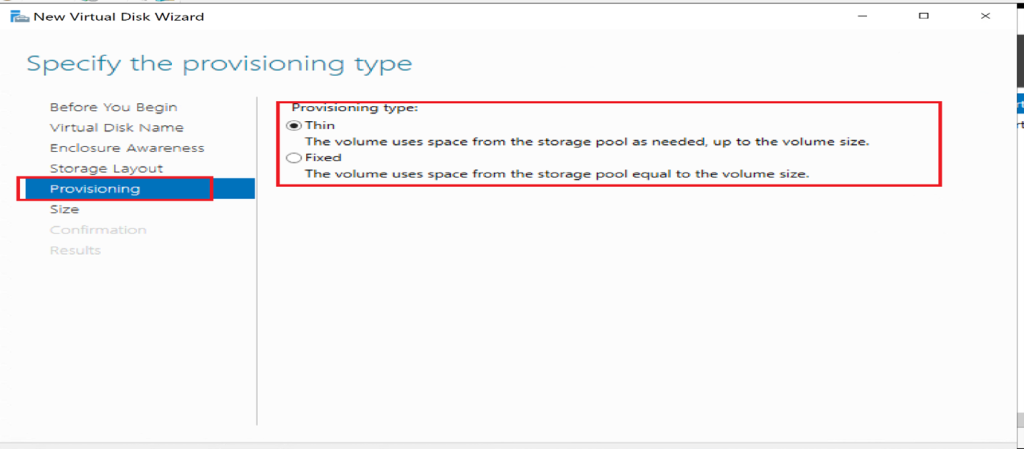
Provisioning Type
- Thin - Allocates space as needed
- Fixed - Reserves the full disk size upfront.
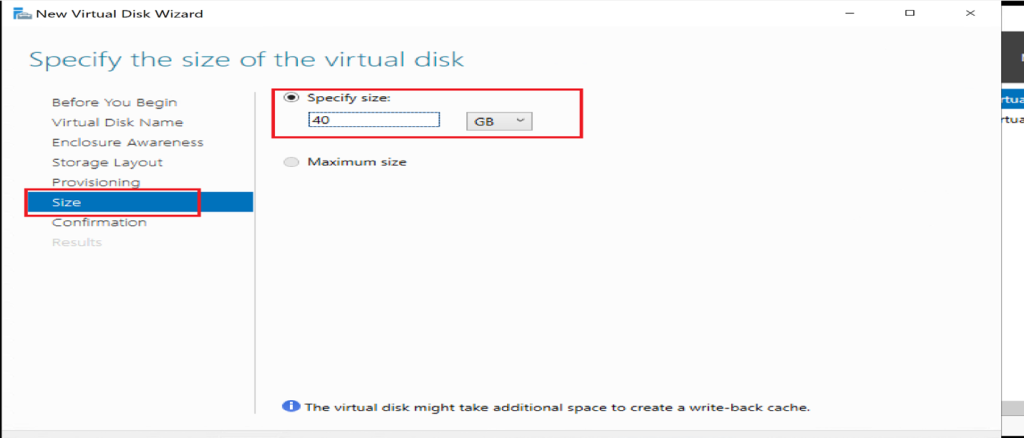
Set the disk size and complete the wizard to create the virtual disk.
Step 4: Format the Disk and Assign a Drive Letter
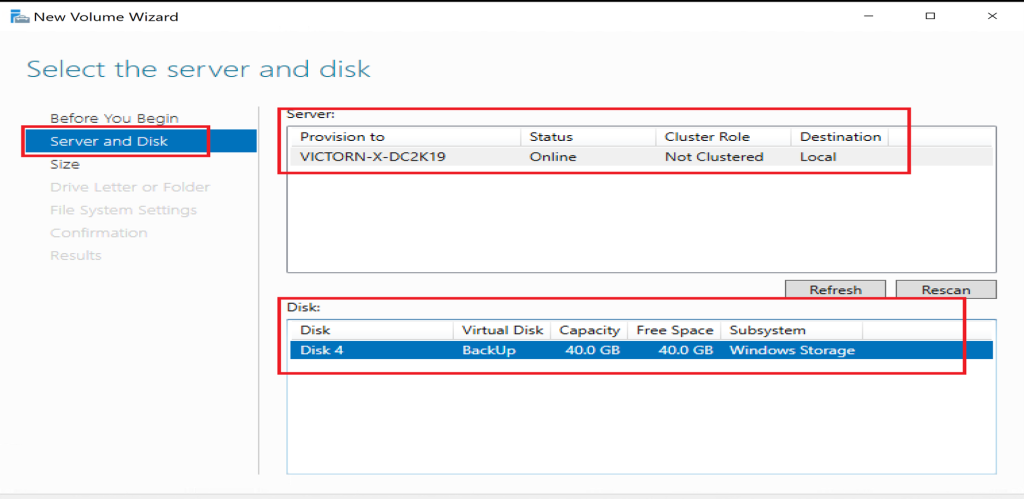
Still in Server Manager, after the disk is created, Click Tasks → New Volume
Select the server and virtual disk
Specify the volume size.
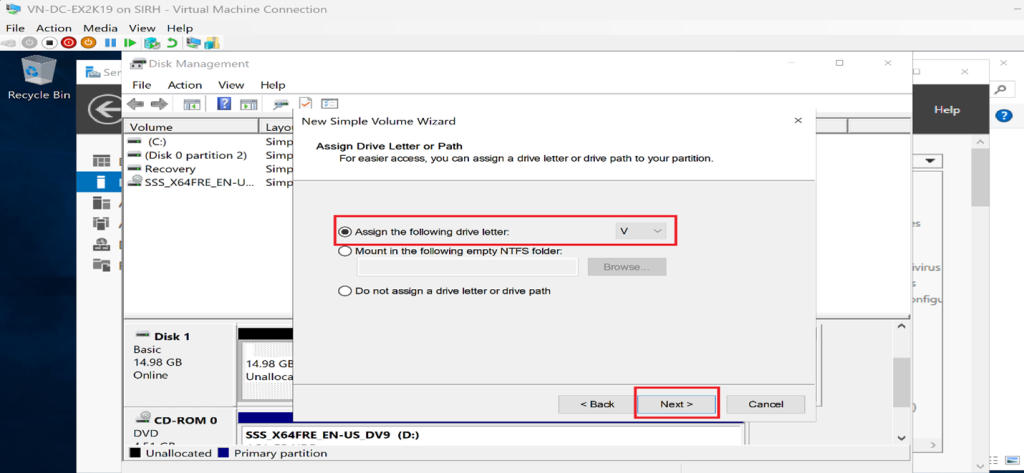
Assign a drive letter or mount as a folder.
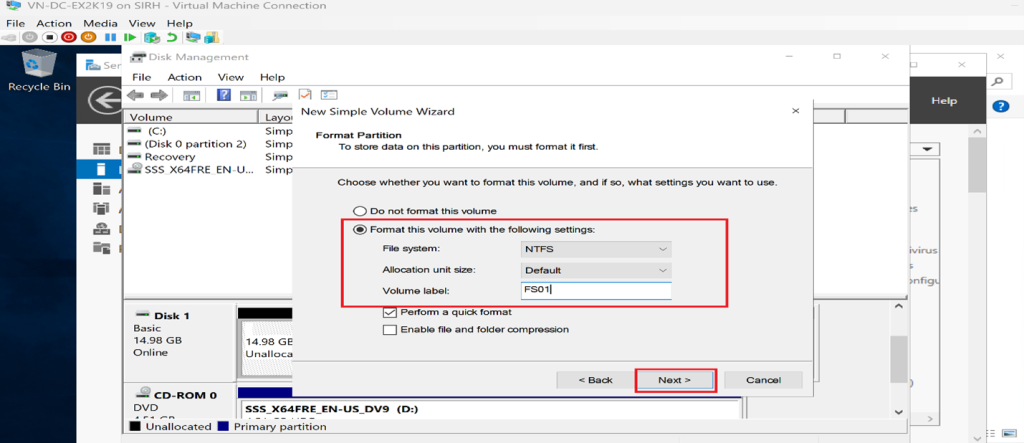
Choose a file system (e.g., NTFS or ReFS), allocation unit size, and provide a volume label.
📌 Finish the wizard to format and mount the volume.
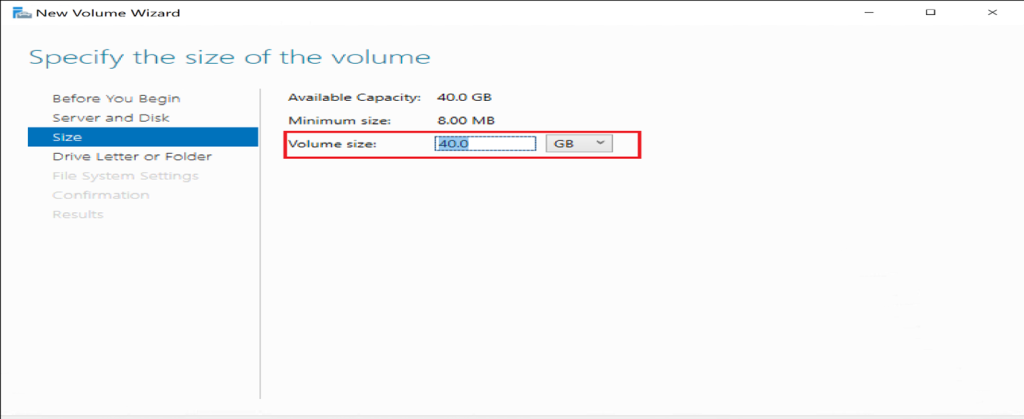
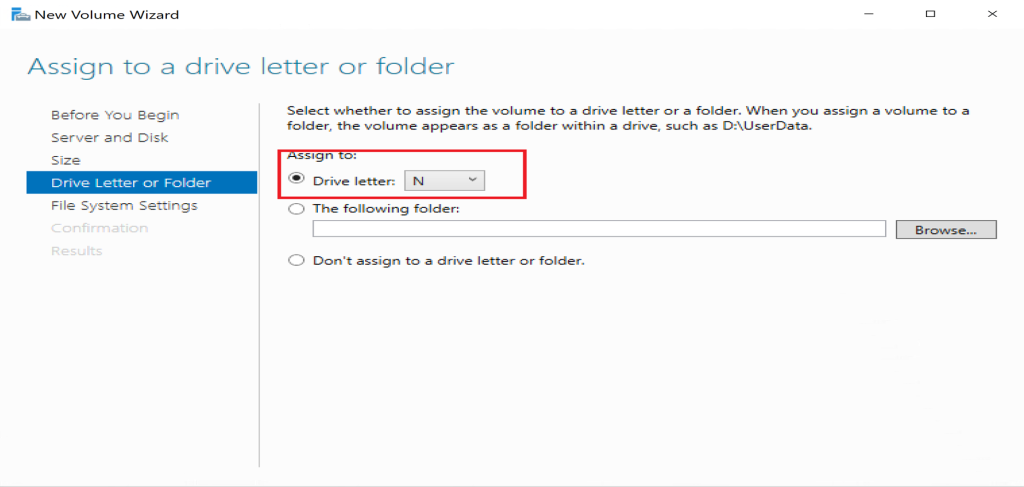
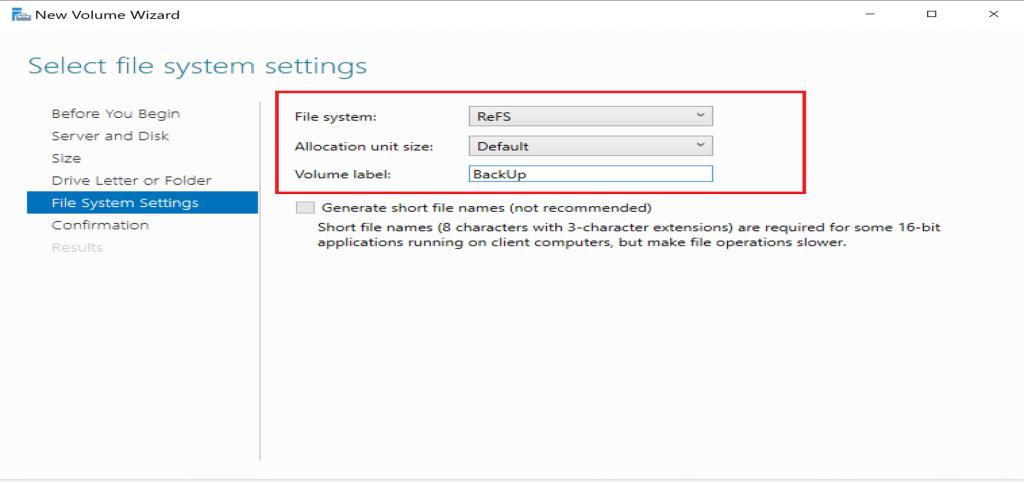
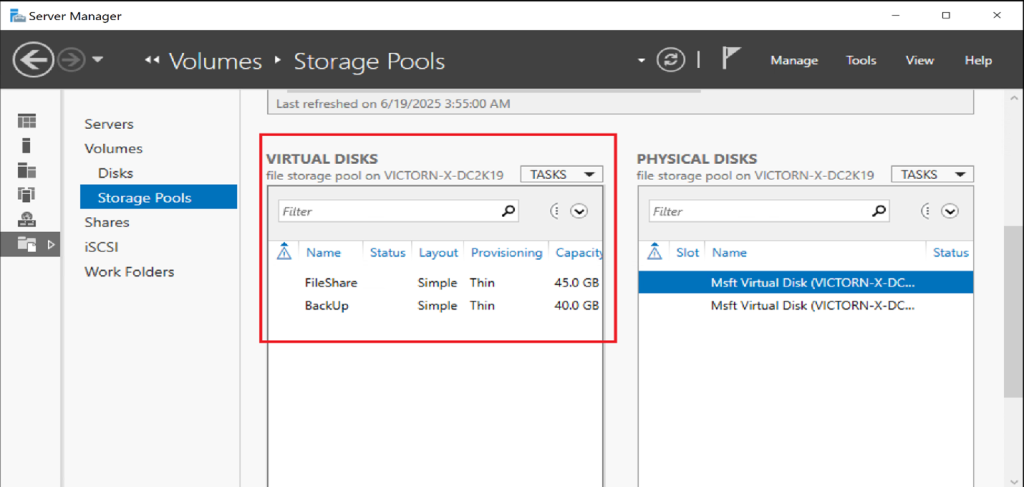
✅ Result: Storage can now be expanded logically without adding physical disks, extending infrastructure lifespan.
Step 5: Configure iSCSI Target Server (Storage Provider)
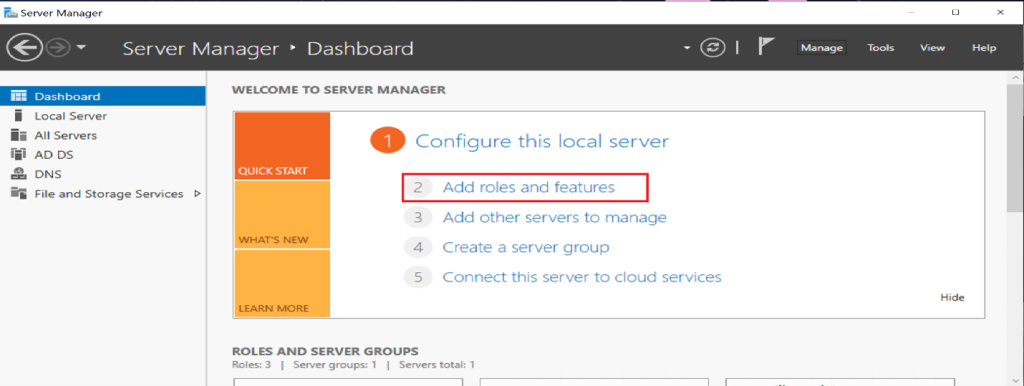
Install iSCSI Target Server Role
- Open Server Manager
- Manage → Add Roles and Features
- Select Role-based or feature-based installation → ClickNext.
- Select your server → Click Next.
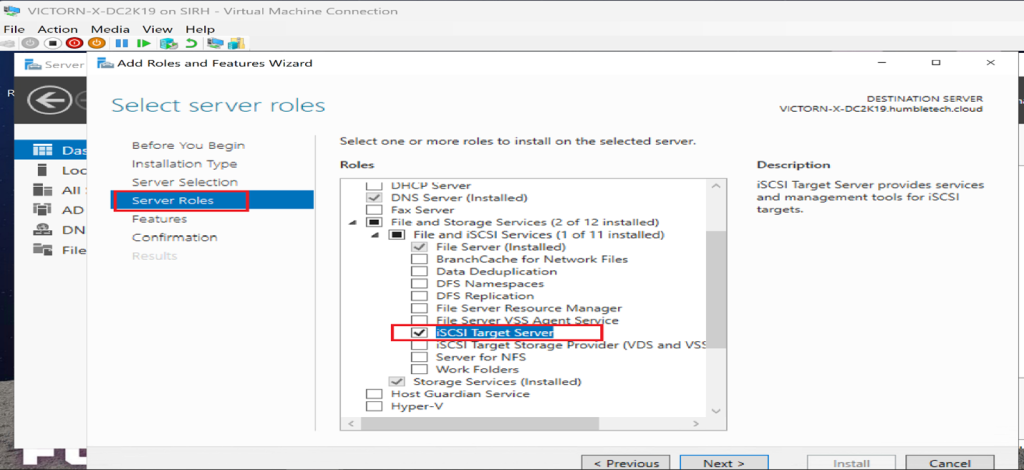
- Under **File and Storage Services → **Expand File and iSCSI Services
- Enable iSCSI Target Server
- Click Next, then Install.
Create an iSCSI Virtual Disk
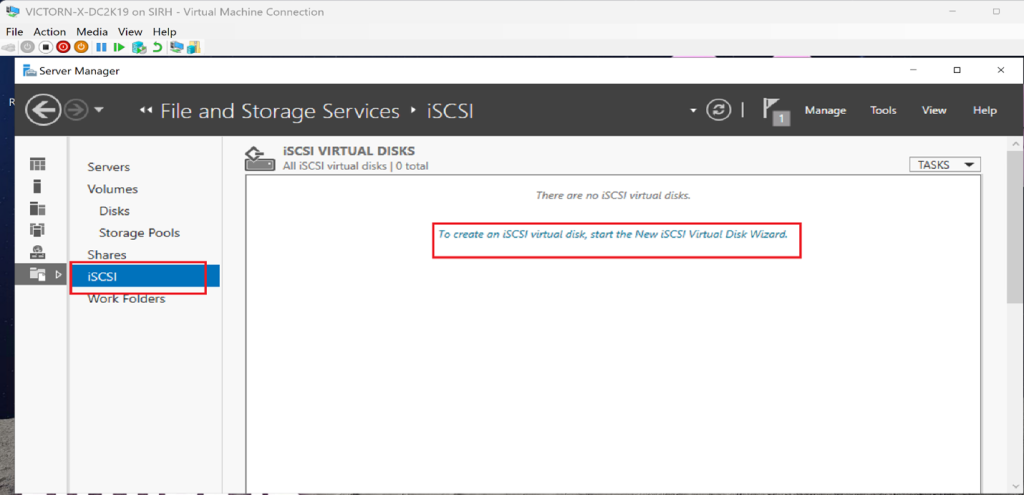
- In Server Manager, go to File and Storage Services and click iSCSI.
- On the right pane, click “To create an iSCSI virtual disk….”
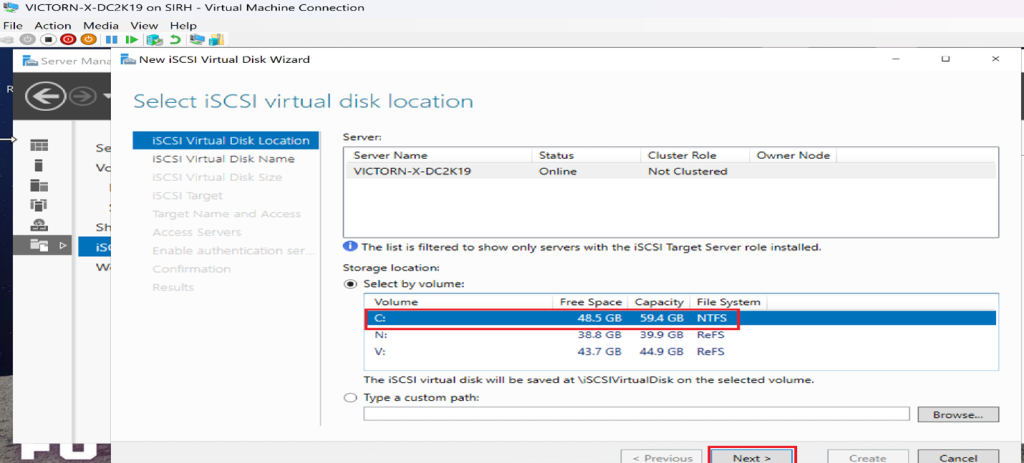
- Choose a volume or custom path to store the virtual disk
- Name the disk → Click** Next.**
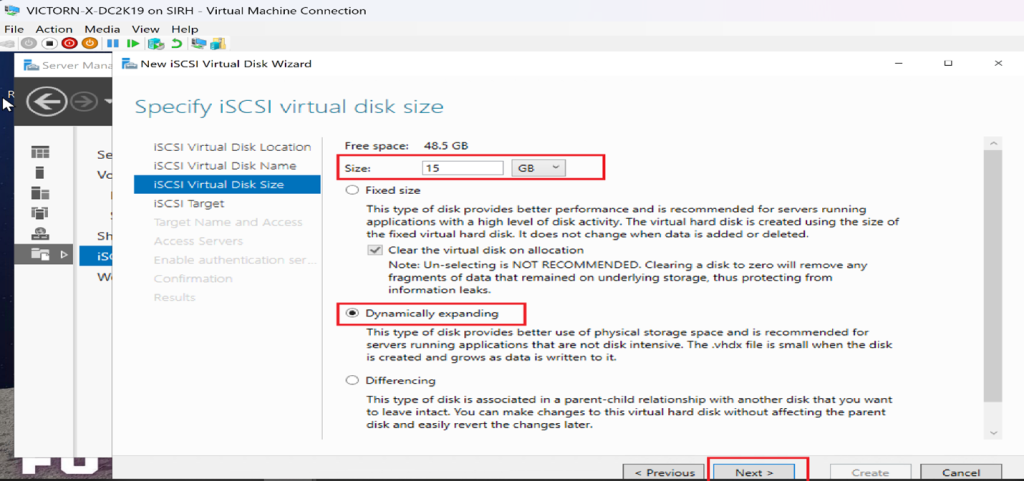
- Set the disk size and choose the type:
- Fixed - pre-allocated space.
- Dynamically Expanding - Grows as needed.
- Differencing - Tracks changes from a parent disk.
- Click Next to proceed.
Create an iSCSI Target
- Choose New iSCSI Target** → Click Next.**
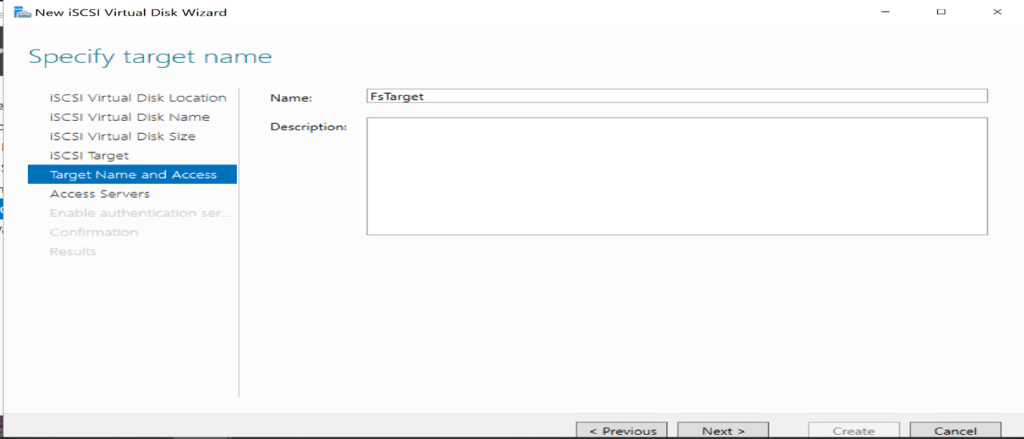
- Name the target → Click Next.
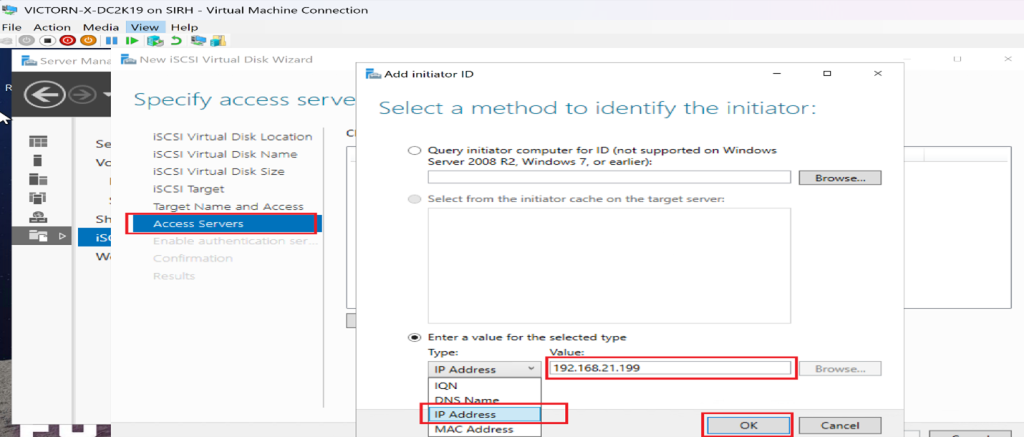
- Click **Add **to specify access servers:
- Choose IP Address and enter the initiator server’s IP.
- (Optional) Enable CHAP authentication for security.
- Review settings → Click Create.
Step 6: Configuring iSCSI Initiator for Remote Storage Access Server
** Steps to Access the Storage Pool from the Access Server**
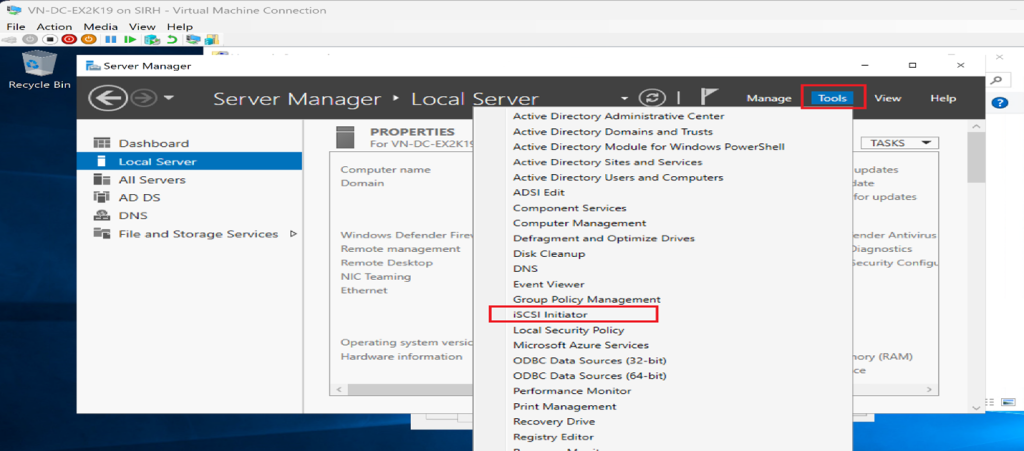
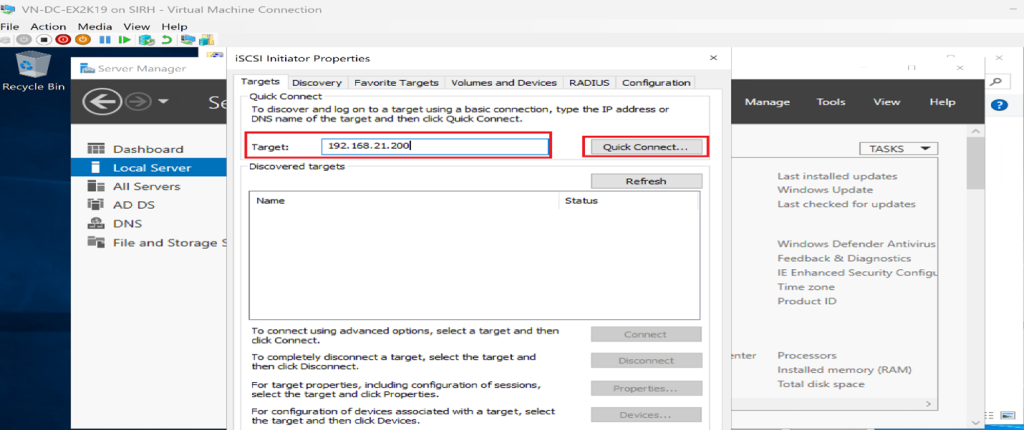
- Enable **iSCSI Initiator **on the Access Server.
- Open **iSCSI Initiator Properties **
- Go to **Discovery → **Click Discover Portal
- Enter the IP address of the Target Server and click OK.
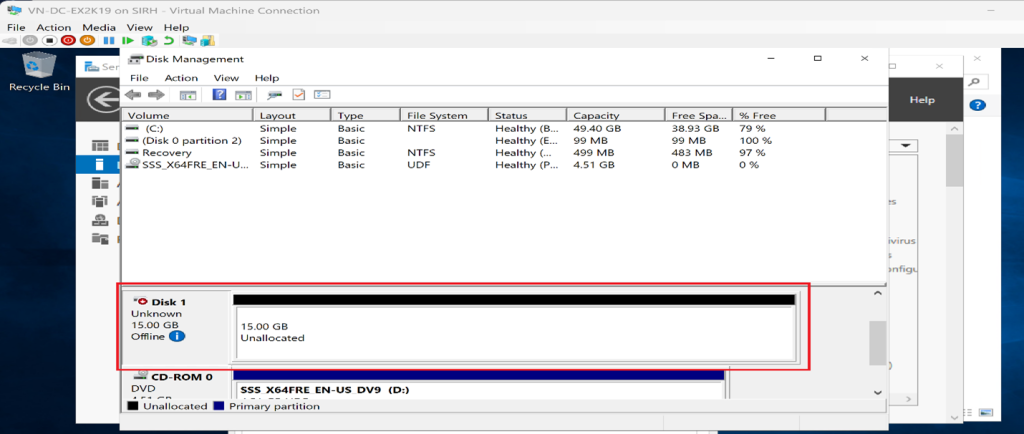
- Go to Targets → Select the discovered target** → Click ** Connect.
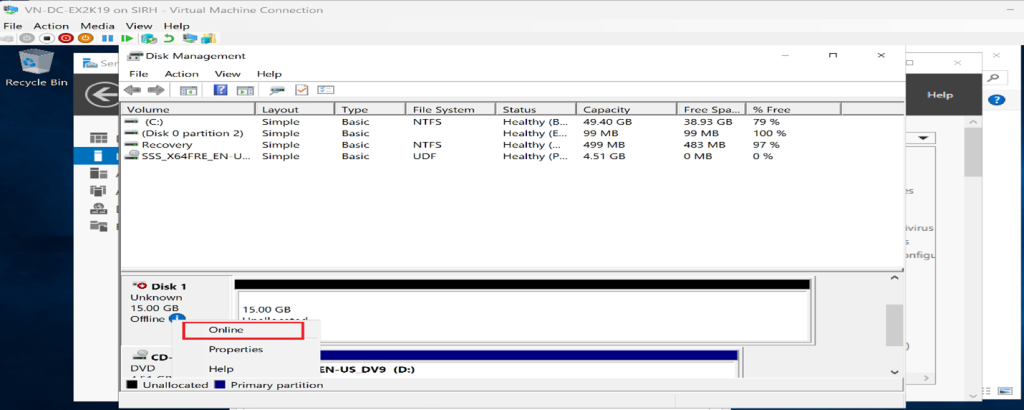
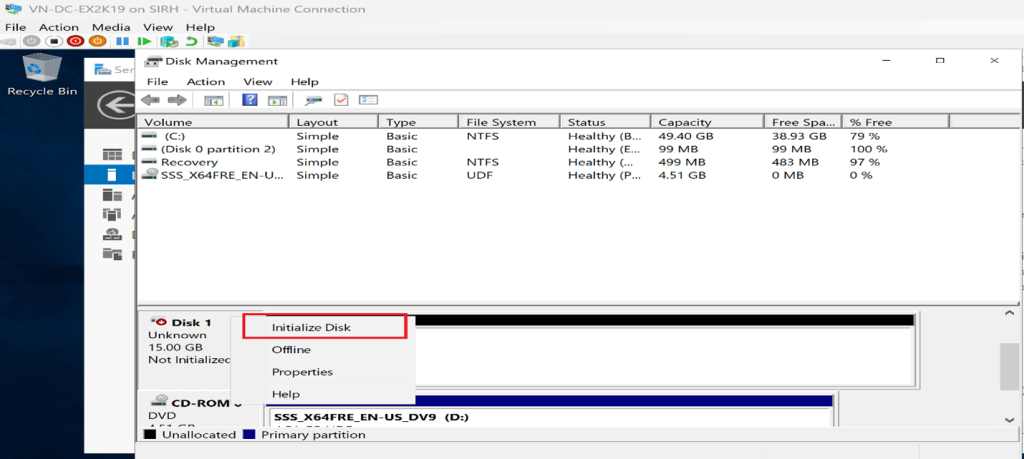
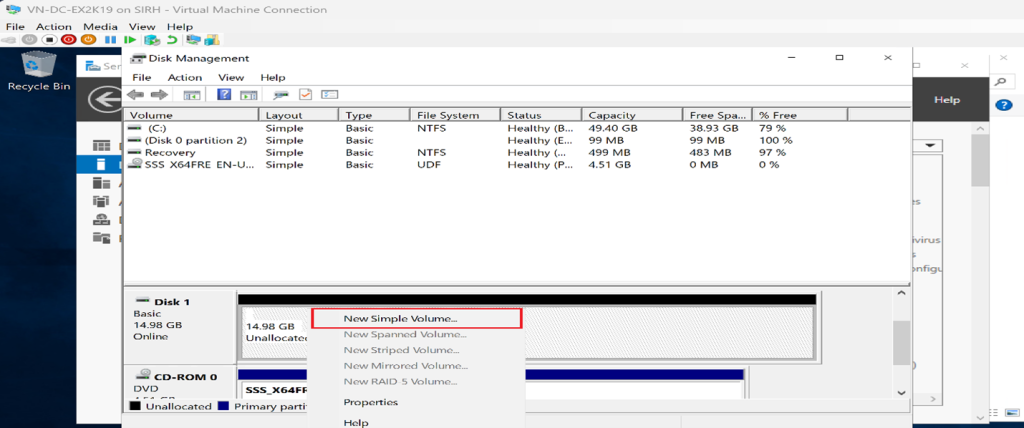
- Open Disk Management
- Initialize and format the newly connected disk.
✅ Final Steps:
- Assign a drive letter to the disk.
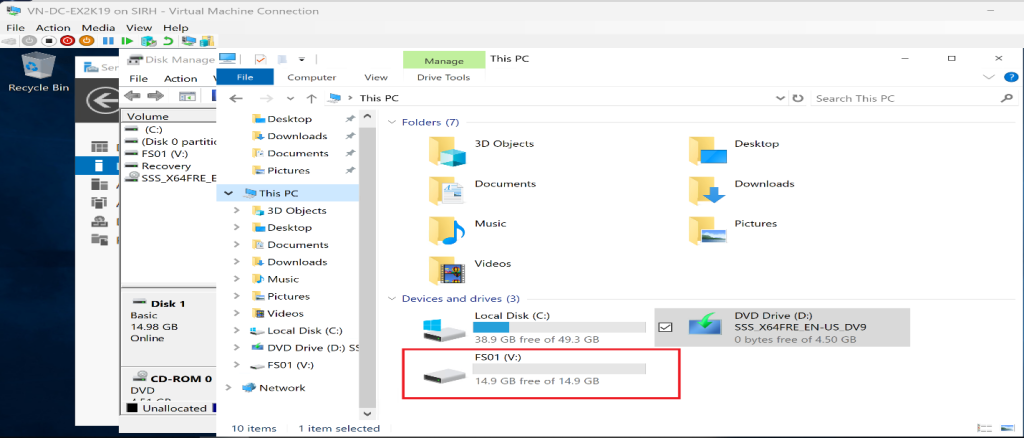
- Verify connectivity and storage availability.
Final Result
The virtual disk is now exposed via iSCSI. The initiator server can access it as if it were local storage, enabling:
- Centralized storage
- Easier scaling
- Improved workload consolidation
Key Takeaway
If you’re running Hyper-V or any hypervisor, storage strategy should be a top priority.
Efficient storage management is foundational for:
- Virtualization
- Hybrid cloud workloads
- Enterprise scalability
- Performance and resilience
Smart storage decisions today prevent outages and costly redesigns tomorrow.