This lab demonstrates how to design and implement secure file system management in a domain environment using Active Directory, Windows Server 2019, and Hyper-V.
The focus is on enterprise-style file sharing, using NTFS permissions, group-based access control, and mapped network drives, all aligned with real-world Windows domain best practices.
Lab Context & Prerequisites
This lab builds on earlier foundational work:
Prerequisites
- Active Directory Domain Services installed and functional
- Domain-joined client computer
- Domain administrator credentials
- Hyper-V networking configured
Lab Objective
To securely manage shared resources in a Windows Server domain by:
- Deploying a file server
- Using group-based NTFS permissions
- Mapping network drives for domain users
- Enforcing least-privilege access
Understanding File Systems in Windows (Foundation)
Before configuring permissions, it’s important to understand Windows file systems:
FAT32 (File Allocation Table 32)
- Legacy file system
- Maximum file size: 4 GB
- ❌ No file-level security
- ❌ Not suitable for domain environments
exFAT (Extended File Allocation Table)
- Optimized for removable storage
- ❌ No NTFS-style permission model
- ❌ Not recommended for Windows domains
NTFS (New Technology File System)
- Supports file and folder permissions
- Enables auditing, encryption, and compression
- ✅ Required for enterprise and domain security
Conclusion: NTFS is the only suitable file system for secure domain-based file management.
Step-by-Step Lab Tasks
Step 1: Set Up the File Server
- Use Windows Server 2019 to host shared folders
- Ensure the server is domain-joined
On your Domain Controller, open Server Manager
Go to Add Roles and Features. → Choose File and Storage Services → Install the File Server role.
Step 2: Create Organizational Units and Security Groups
- Create OUs for logical separation
- Create security groups in Active Directory
- Follow best practice: assign permissions to groups, not users
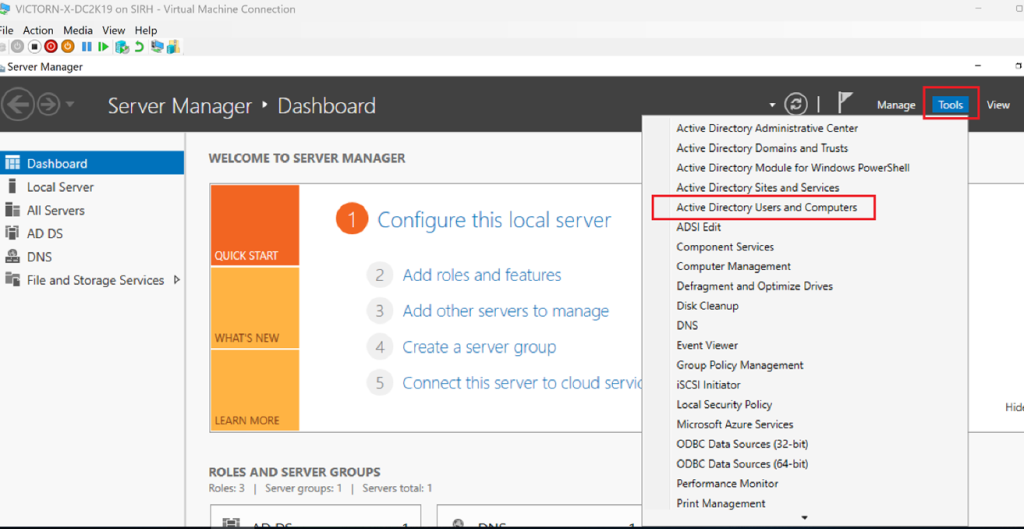
Go to Server Manager → Tools → Use Active Directory Users and Computers (ADUC)
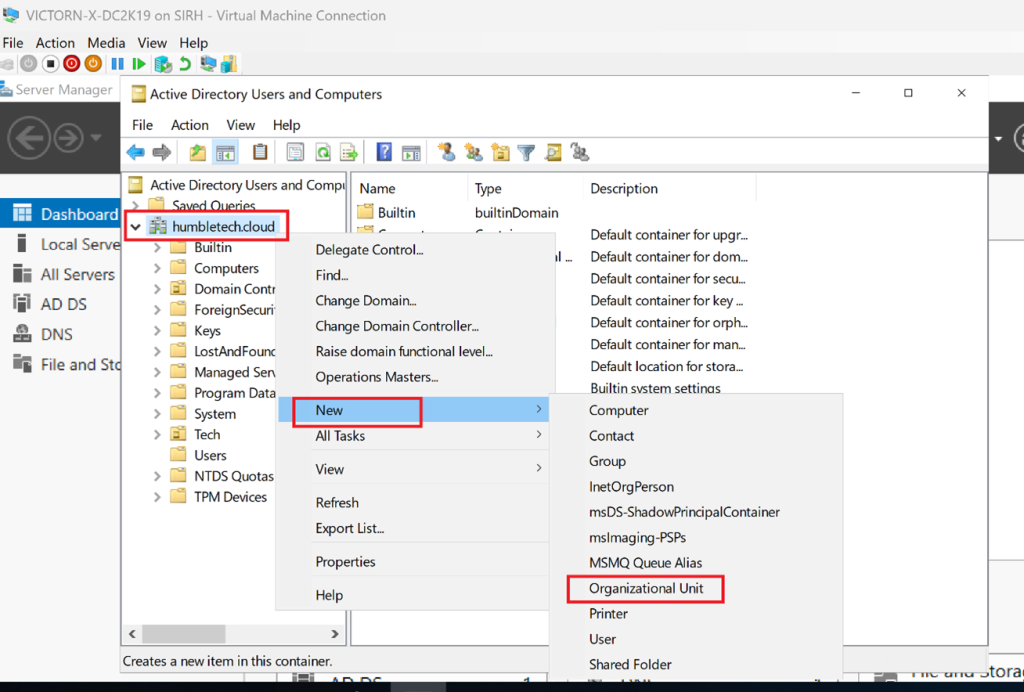
Right-click the domain (humbletech.cloud) → New → Organizational Unit
Name the OU (e.g., HR Dept) → Click OK
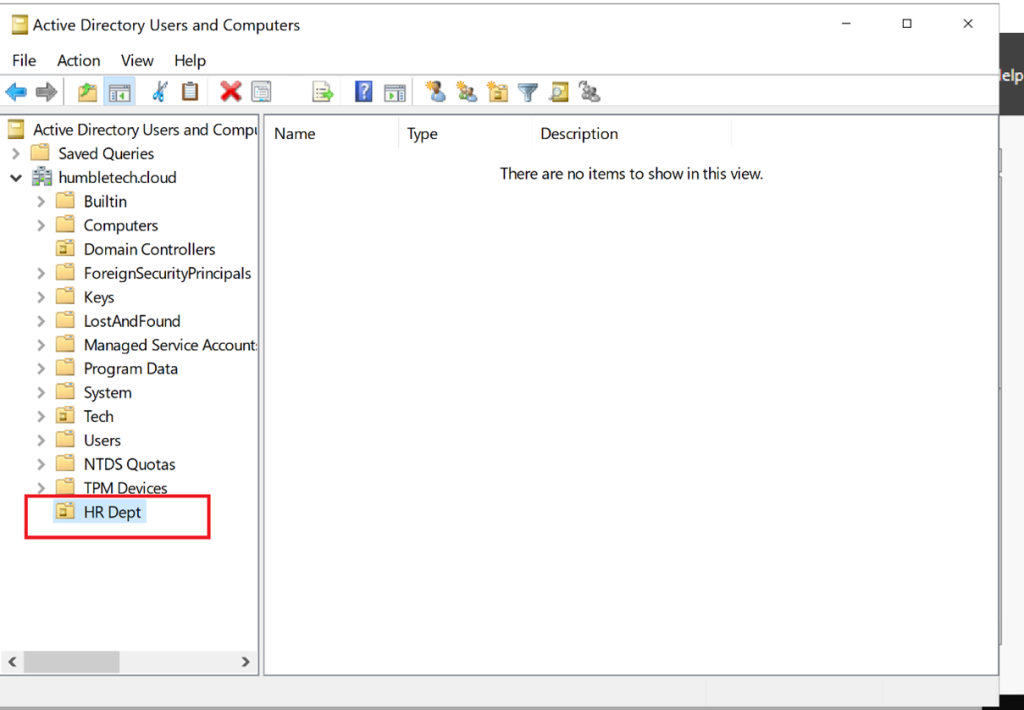
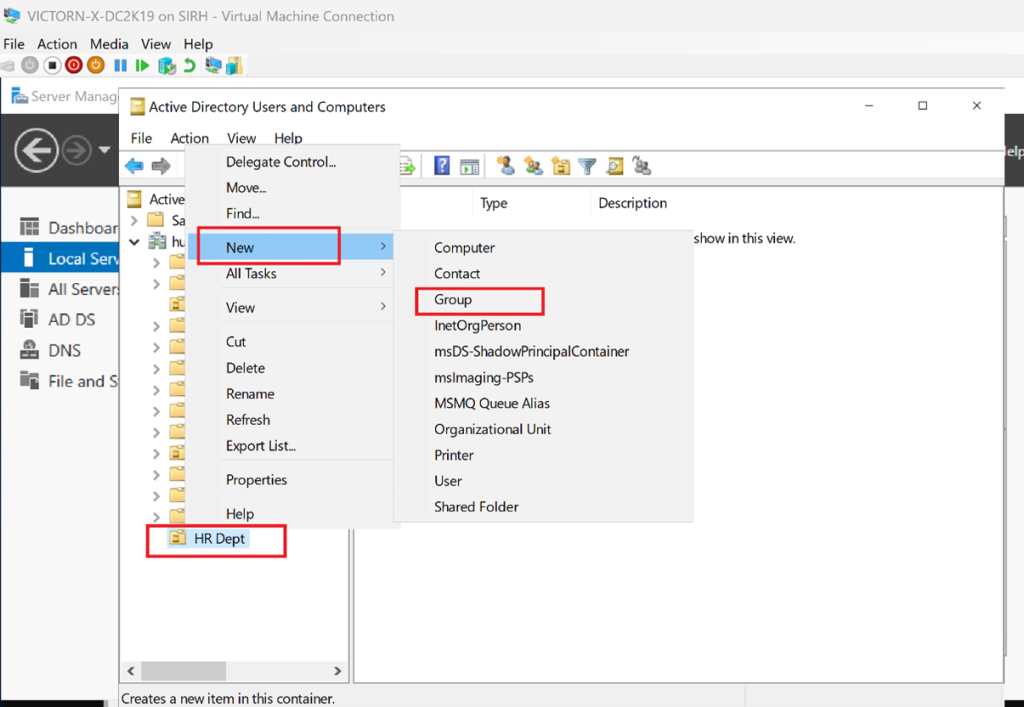
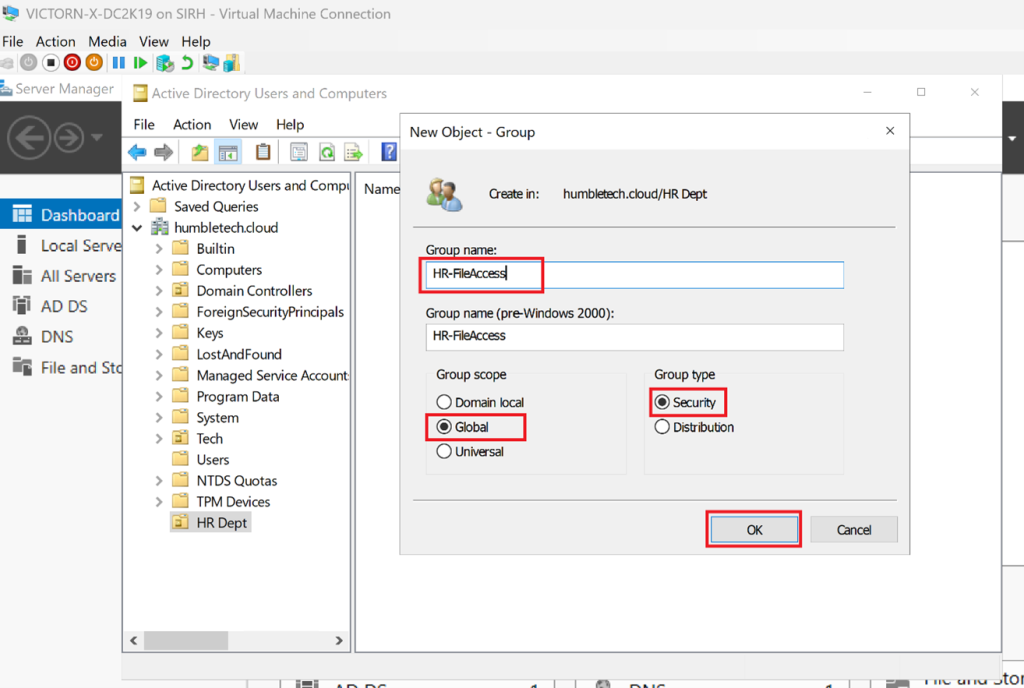
Navigate to the newly created OU → Right-click the OU → New → Group
Enter the group name (e.g., HR-FileAccess) →Choose group scope (e.g., Global) and type (e.g., Security) →Click OK
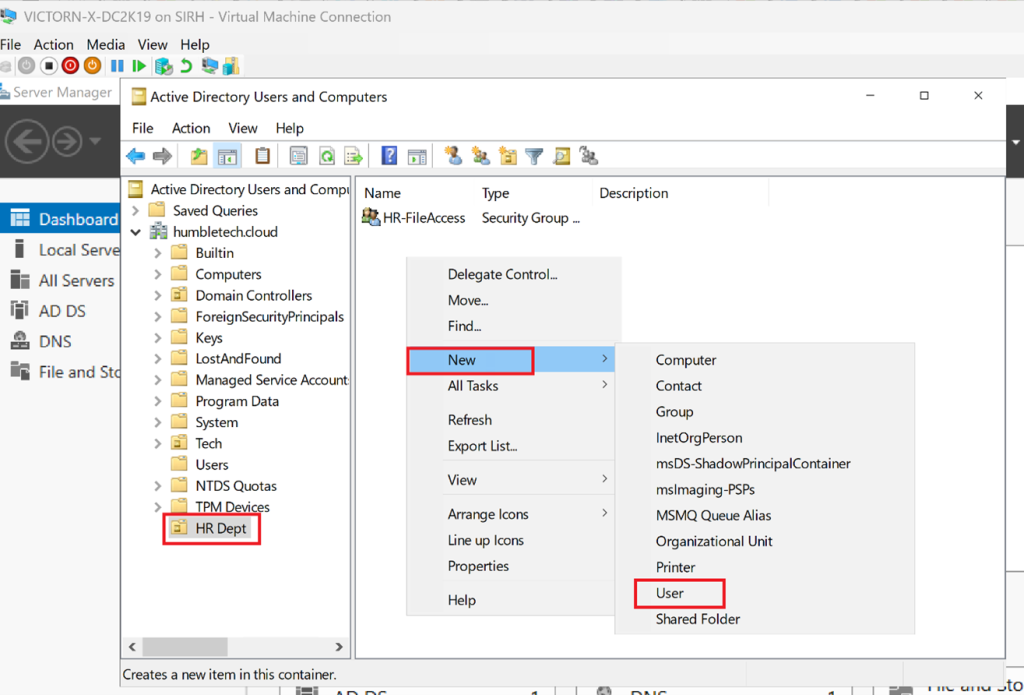
Right-click the OU → New → User
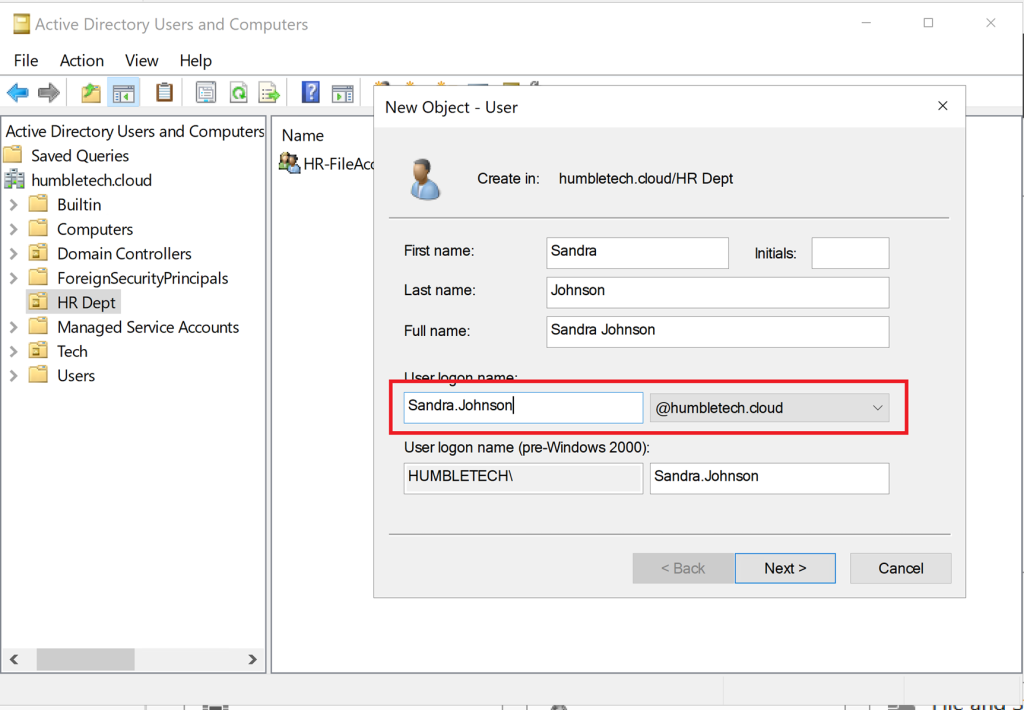
Fill in the First Name, Last Name, and **User Logon Name → **Set a password
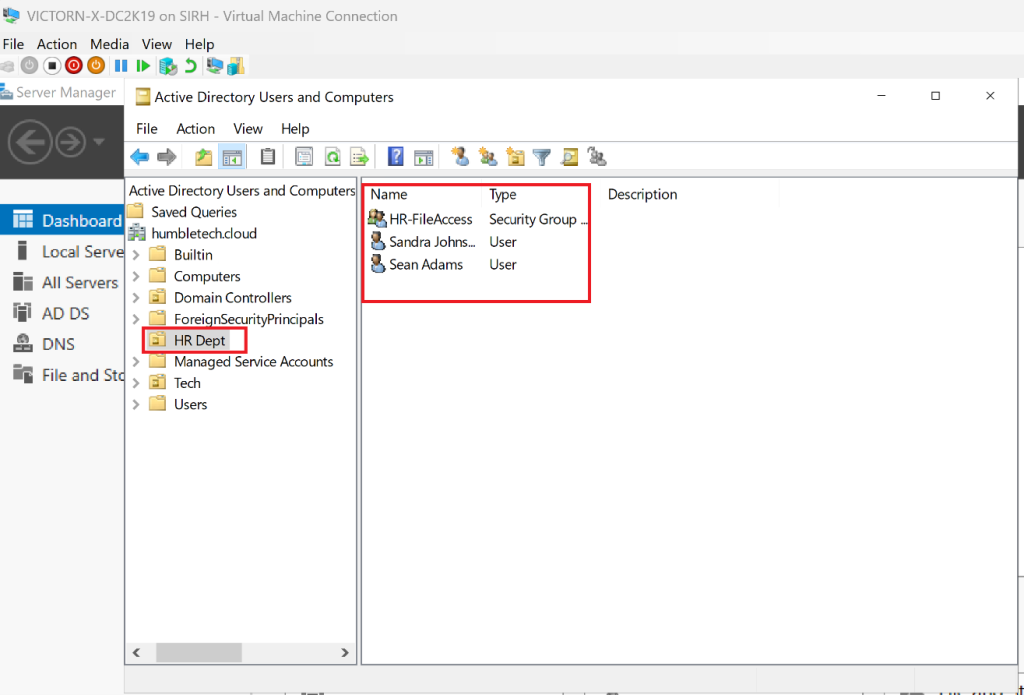
Go to the **Member **Tab → Click Add
Search and select the group (e.g., HR-FileAccess) → Click** OK**
Step 3: Create and Share a Folder
- Create a structured folder hierarchy (e.g., by department)
- Configure basic share settings
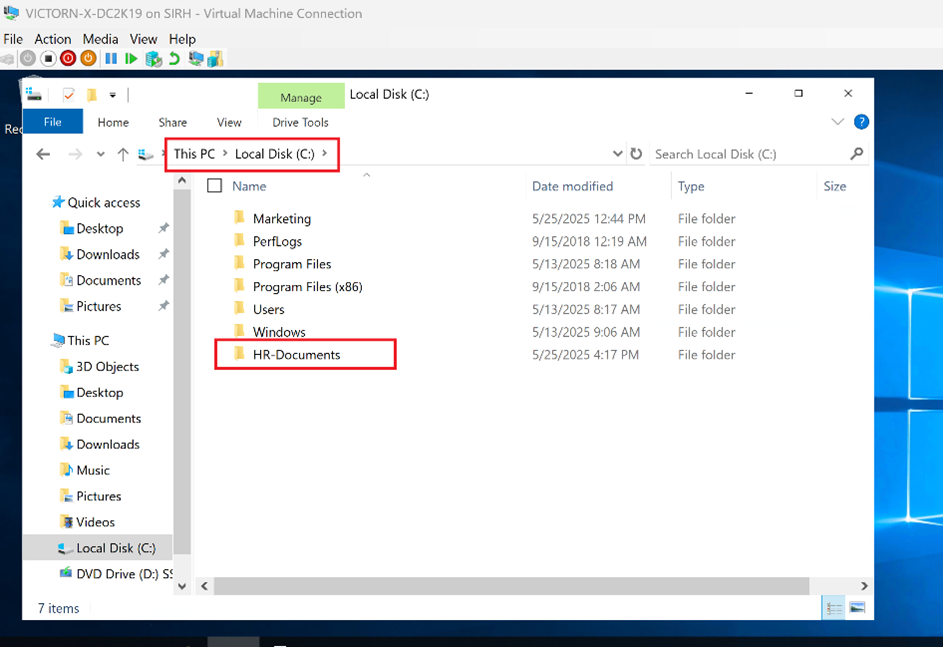
Create a folder (e.g., C:\ C:\C:\VICTORN-X-DC2K19\HR-Document)
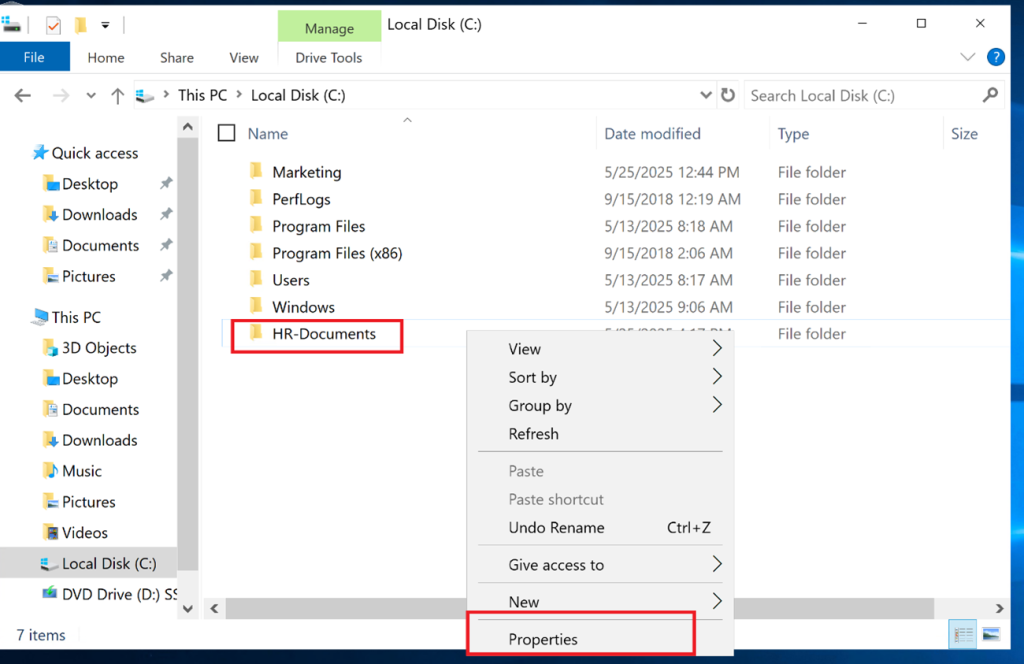
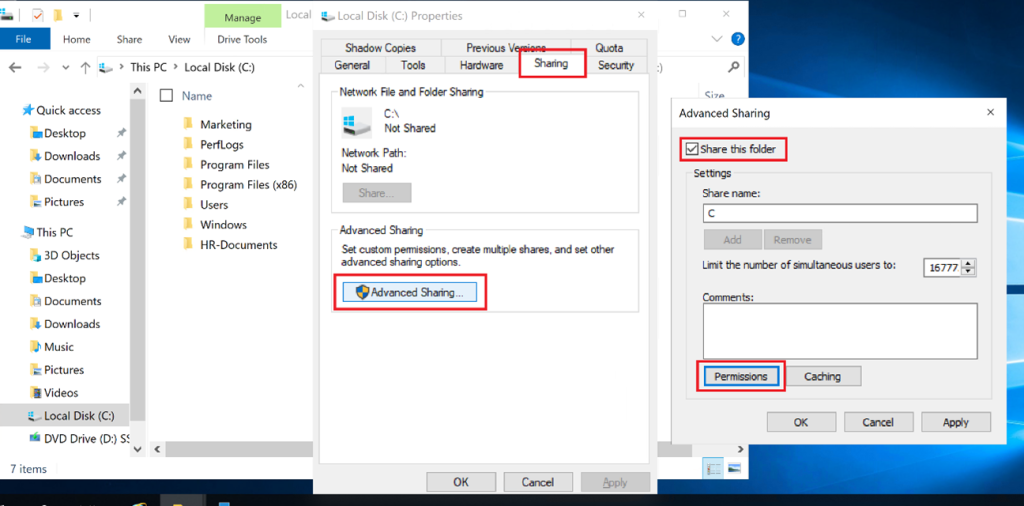
Right-click on the Folder → Properties → Sharing Tab → Advanced Sharing
Check “Share this folder”
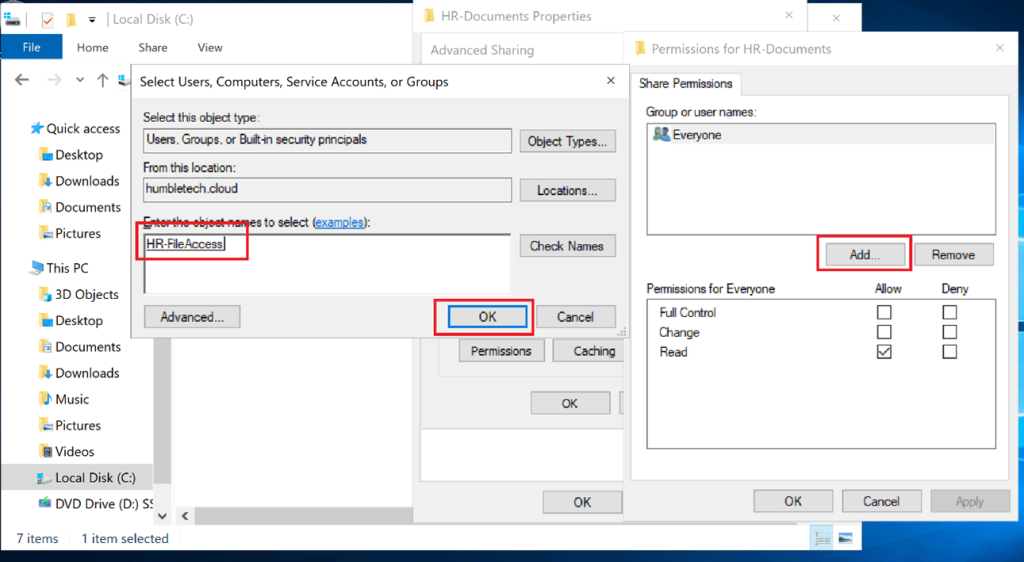
Click** Permissions** and assign Everyone: Read or custom settings
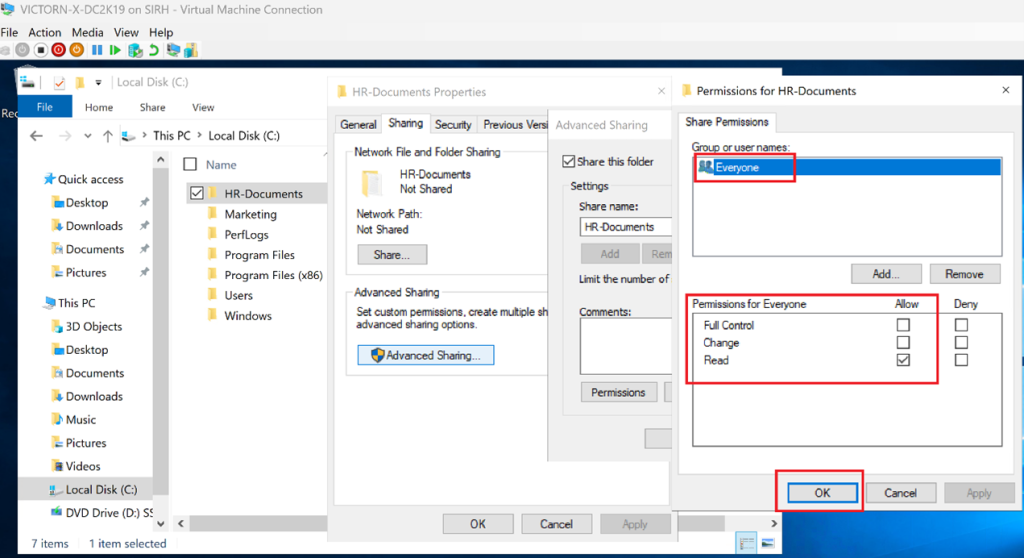
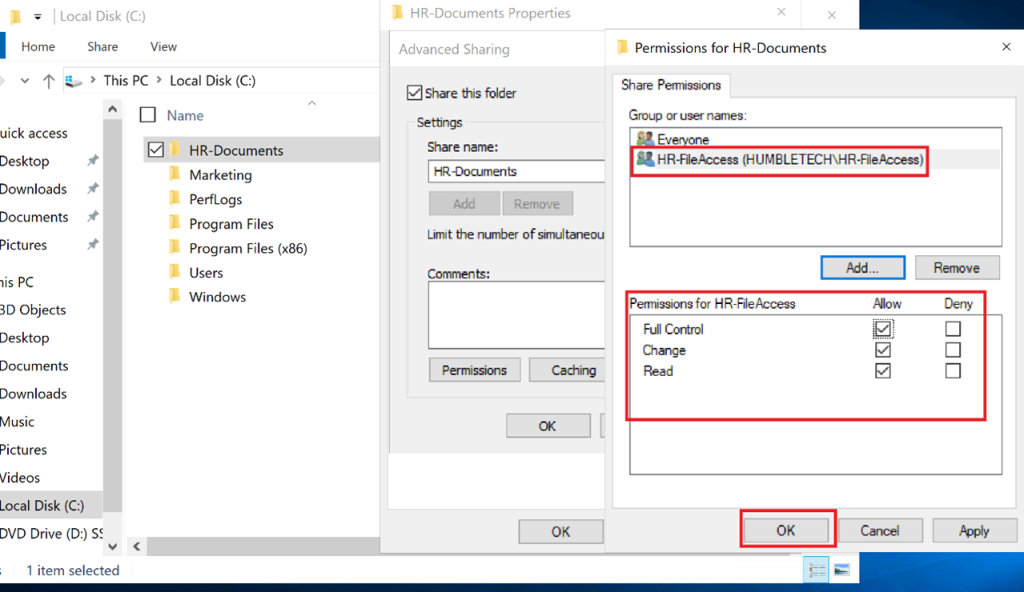
Click Add → Search and select the group (e.g., HR-FileAccess) → Click** OK**
Permissions for Everyone: and assign Full Control → Click OK
Step 4: Configure NTFS Permissions (File System Security)
- Apply NTFS permissions at the folder level
- Remove excessive inherited permissions
- Grant Read / Modify / Full Control based on role
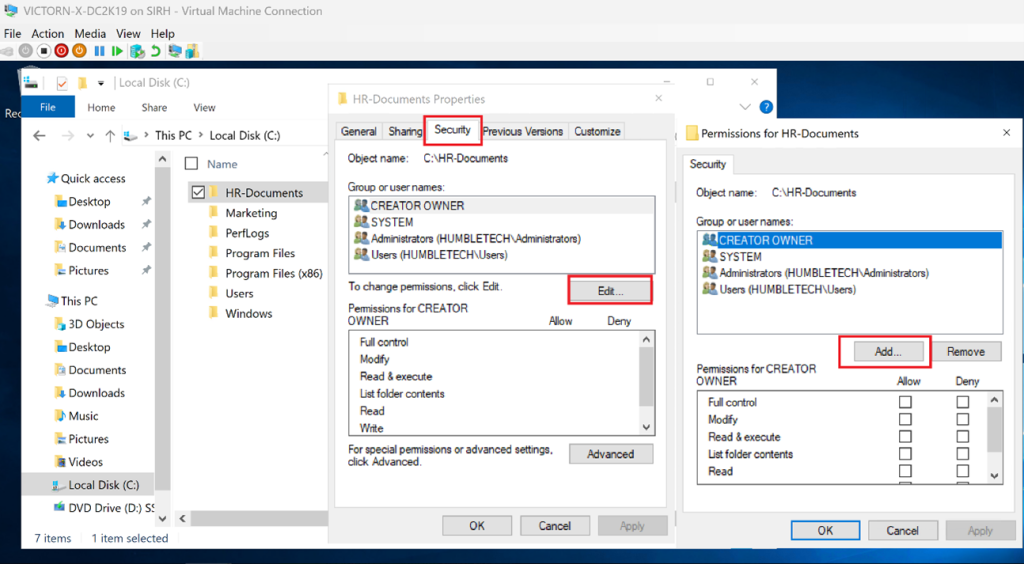
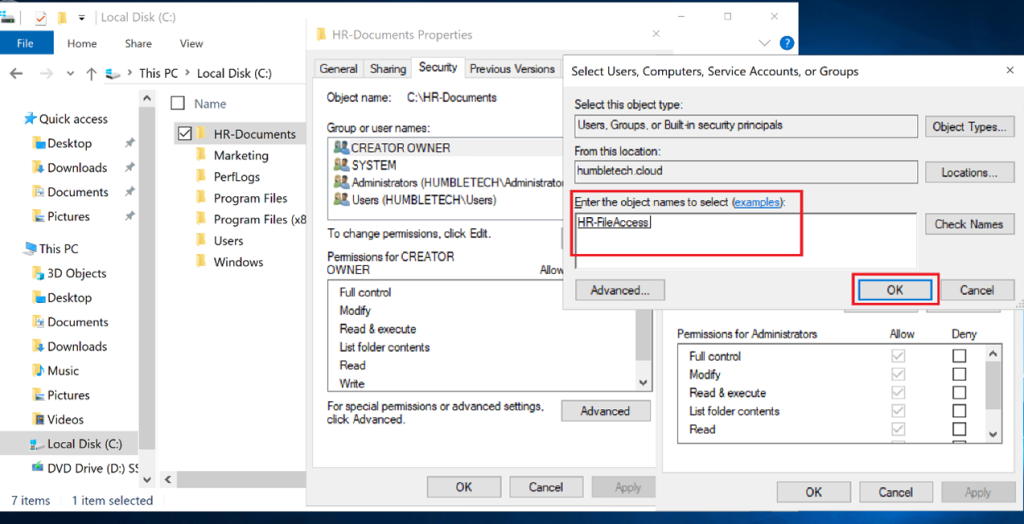
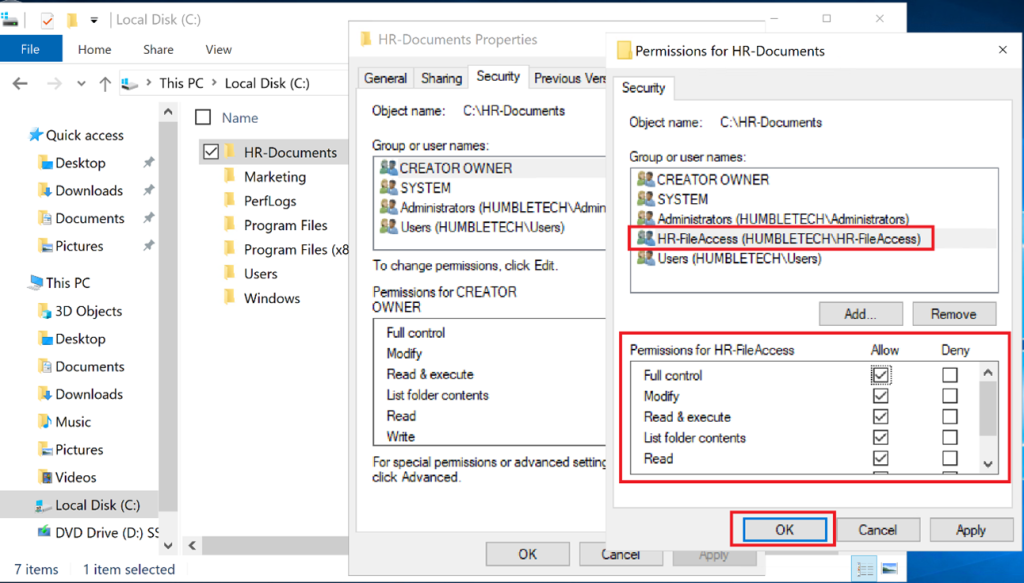
Go to Security tab → Click Edit → Add domain groups
Assign specific permissions: Full Control or Custom settings.
Tips: Always assign permissions to groups, not individual users, to follow best practices.
Step 5: Assign Group-Based Access to the Shared Folder
- Assign NTFS permissions to security groups
- Validate access by logging in as different users
On the folder’s Security tab, grant the HR-FileAccess group access
Apply the desired NFTS permissions
Step 6: Map Network Drives
- Map shared folders as network drives
- Ensure users only see resources they are authorized to access
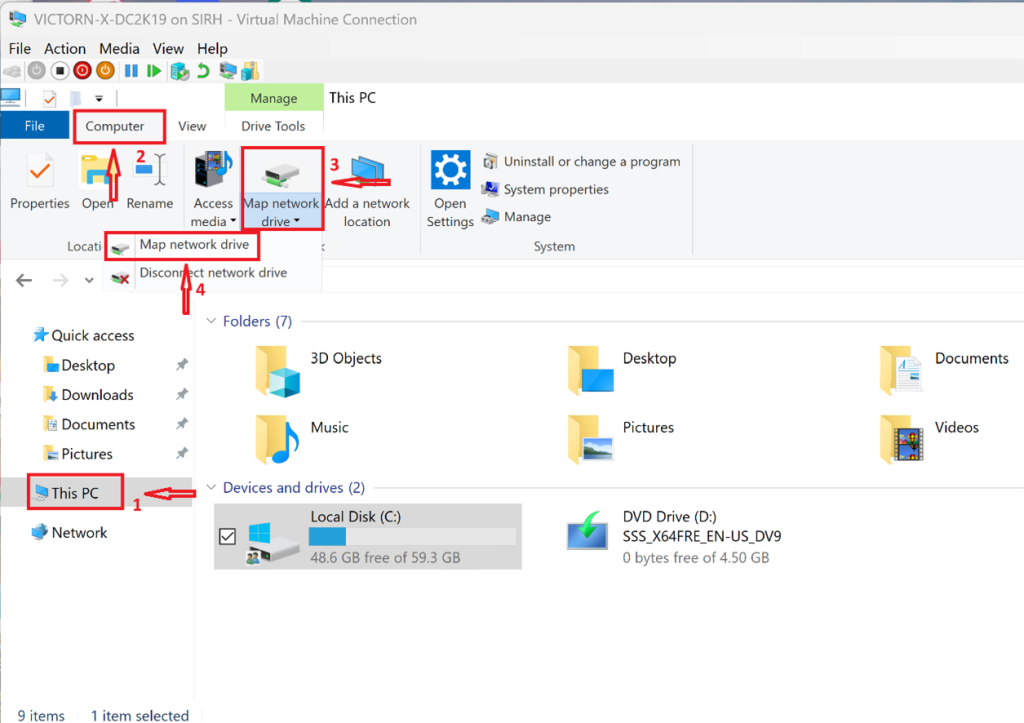
Navigate to This PC → **Computer **→ Map network drive and select Map network drive
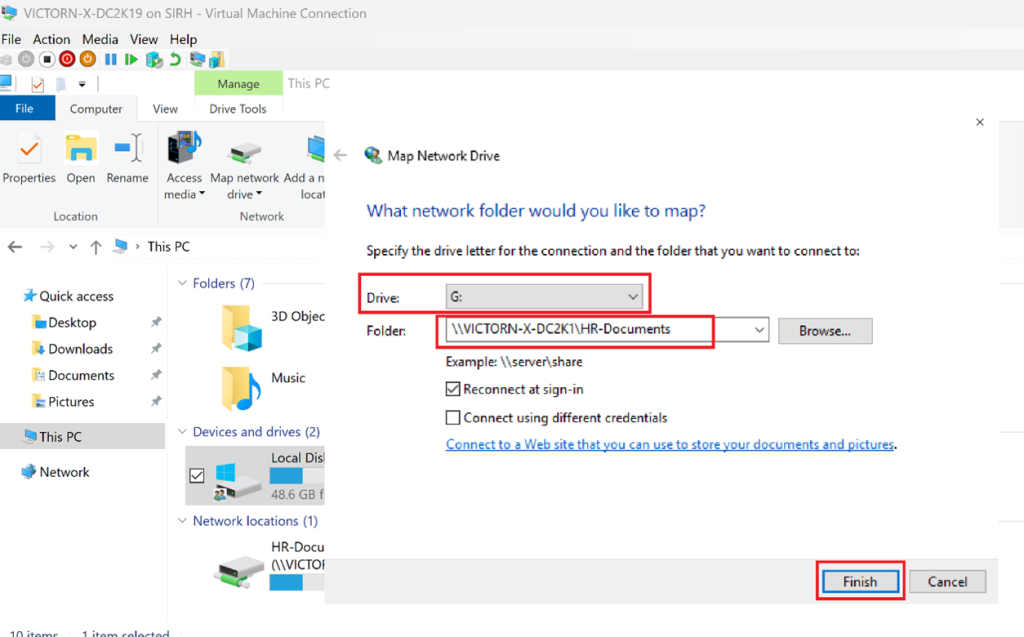
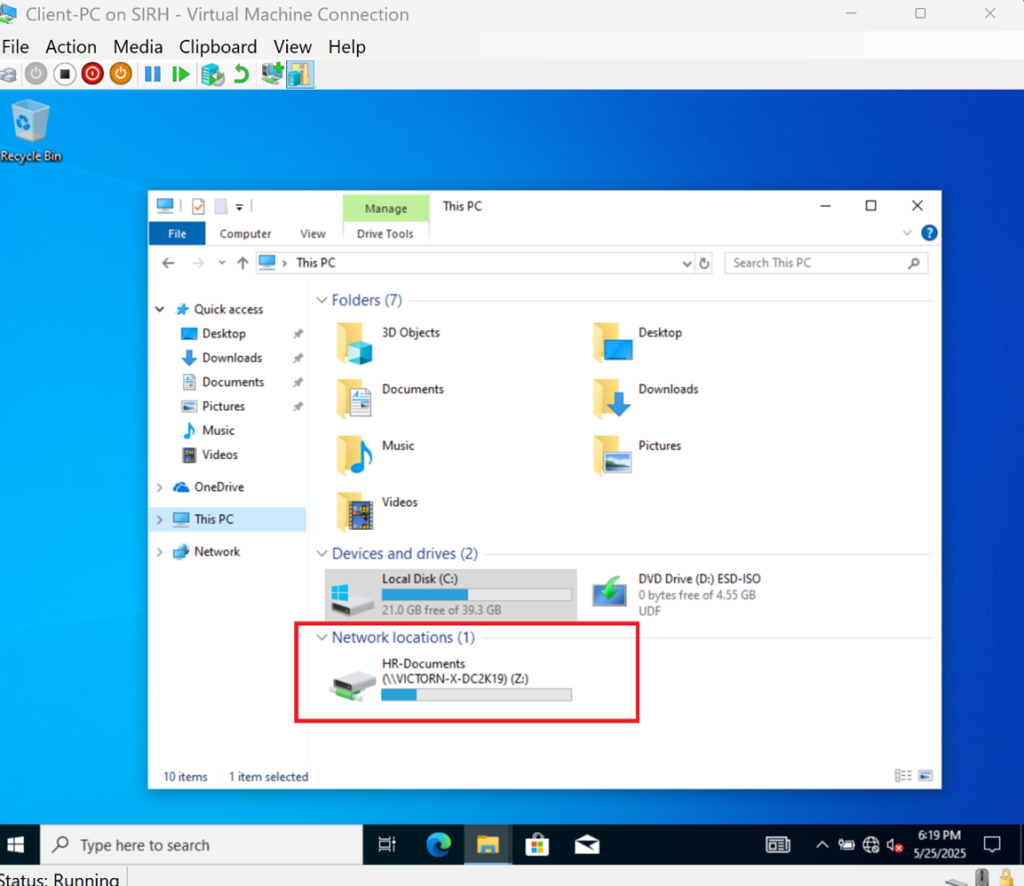
**Map a Drive **to the shared folder path (e.g., G: drive to \VICTORN-X-DC2K19\HR-Documents)
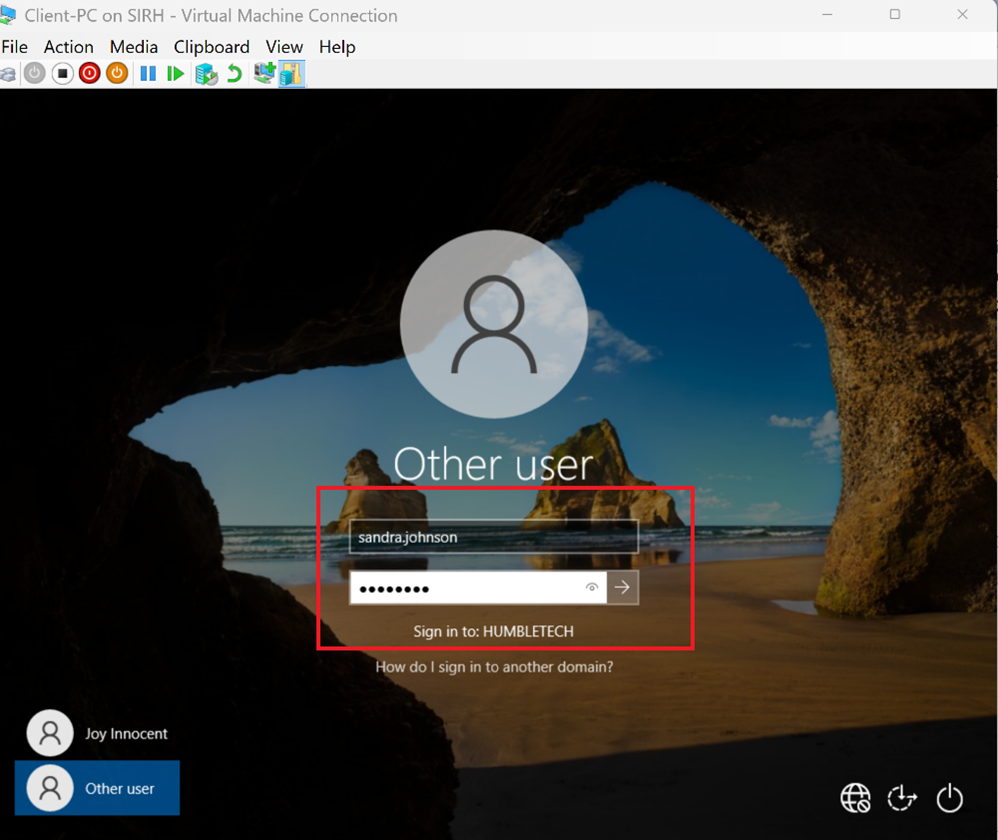
Sign in to your domain user PC you created (e.g., Sandra.johnson@humbletech.cloud)
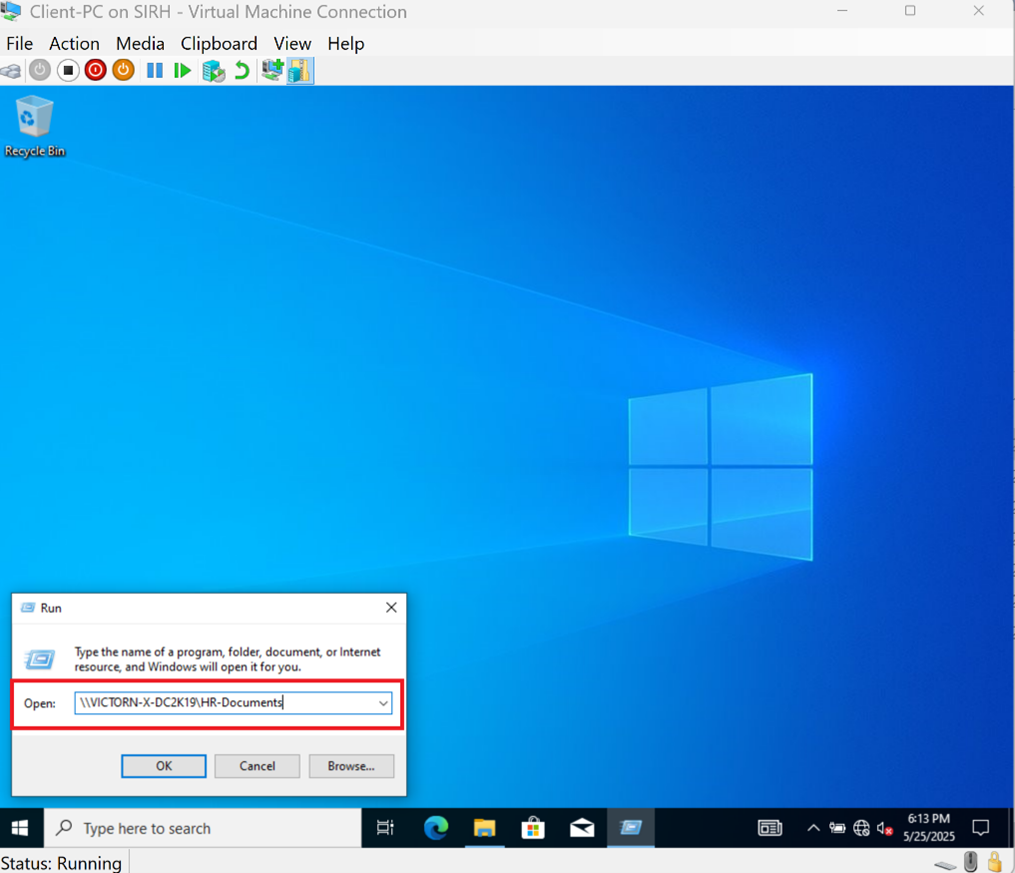
Use** Run** to open \VICTORN-X-DC2K19\HR-Documents to confirm the HR Dept can access the Shared Folder on the Network location.
Congratulations! You Have Successfully Built a Secure File System Management with NTFS Permissions and Mapped Drives in a Windows Server
Why This Lab Matters
This project demonstrates:
- Principle of least privilege access
- Secure, scalable file access management
- Real-world Active Directory file server design
- Enterprise-ready identity and access control practices
These skills are fundamental in on-premises, hybrid, and cloud-connected Windows environments.
Lab Outcome
By completing this lab, the environment includes:
- A secure NTFS-based file server
- Group-controlled access to shared resources
- Mapped drives for domain users
- A realistic corporate IT file management setup